

Use a Project Life Kit to create a Birthday Month Calendar Mini Book. Click here for the complete step-by-step tutorial!
I am a list maker – If I don’t write something down I usually forget.
One thing I am really bad at is remembering birthdays. The only birthdays I have memorized are my kids, parents, and siblings.
Mt poor nieces, nephews, cousins, and friends. I have no idea when their birthdays are.
So I thought making a Birthday Calendar Mini book would help me – plus it is super cute!
More Paper Craft Tutorials:
Paper crafting is totally my jam. Isn’t it amazing all of the things that you can make with paper?
Since I love paper crafting so much, I have several tutorials I’d love to share with you. Like this Decorated Monogram Letter for Wall Decor, this Happy Mail Handmade Card, and these Paper Loop Flowers.
Be sure to look around the blog for more fun craft tutorials!
Supplies You’ll Need to Create this Project:
This post contains affiliate links.
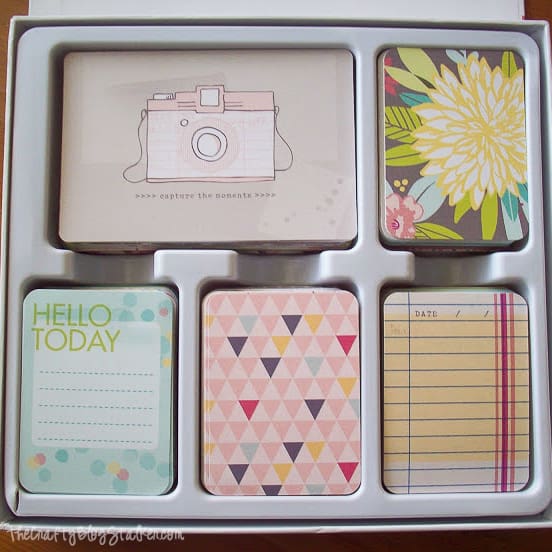
- Project Life Kit
- Chipboard
- Black Ink pad
- White Paint
- Foam Paint Brush
- Tacky Tape Adhesive
- Rub-on Letters
- Ribbon
- Metal Ring
- Hole Punch
Mini Book Tutorial:
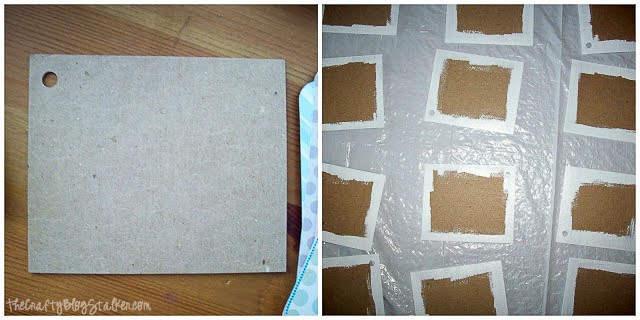
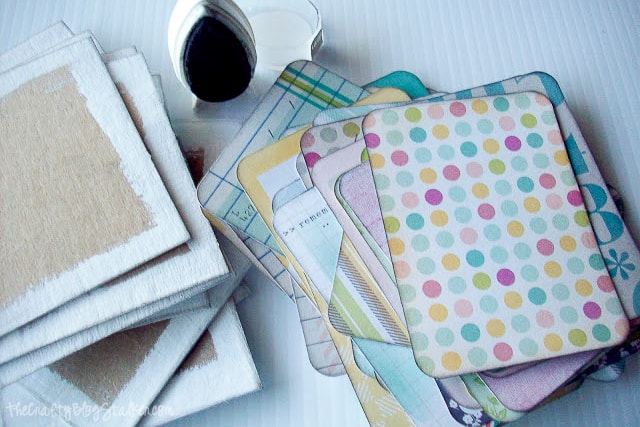
Cut the pieces of chipboard into 13, 4 x 3 1/2 inches rectangles.
Punch a hole in the upper left corner of each chipboard piece. Making sure that the hole is in the same spot on each piece so they line up.
Paint the edges white and let dry.
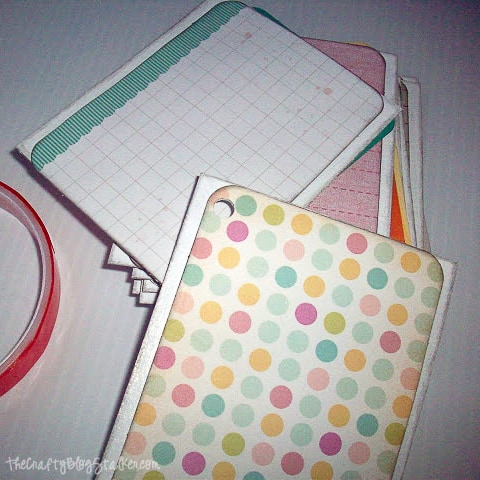
Look through the Project Life Kit and choose 26 of the small papers.
Ink the edges of the paper if you would like. This adds dimension but is completely optional.
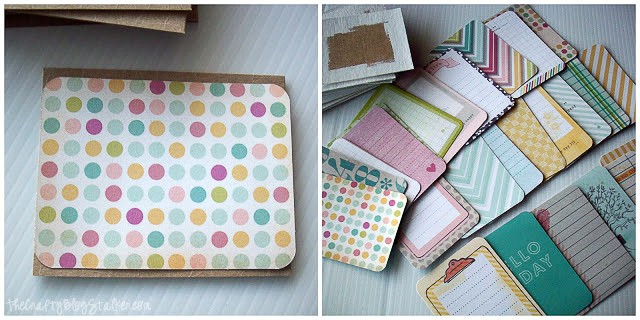
Adhere the first paper on the first chipboard piece.
Before you tape the second paper on the back be sure to use the hole punch to punch a hole in the paper.
Now put your back piece on and punch your hole again.
Repeat until all of the papers are on your chipboard.
Place all of the pages on the metal ring.
Using the rub-on letters, add the title and months to the pages.
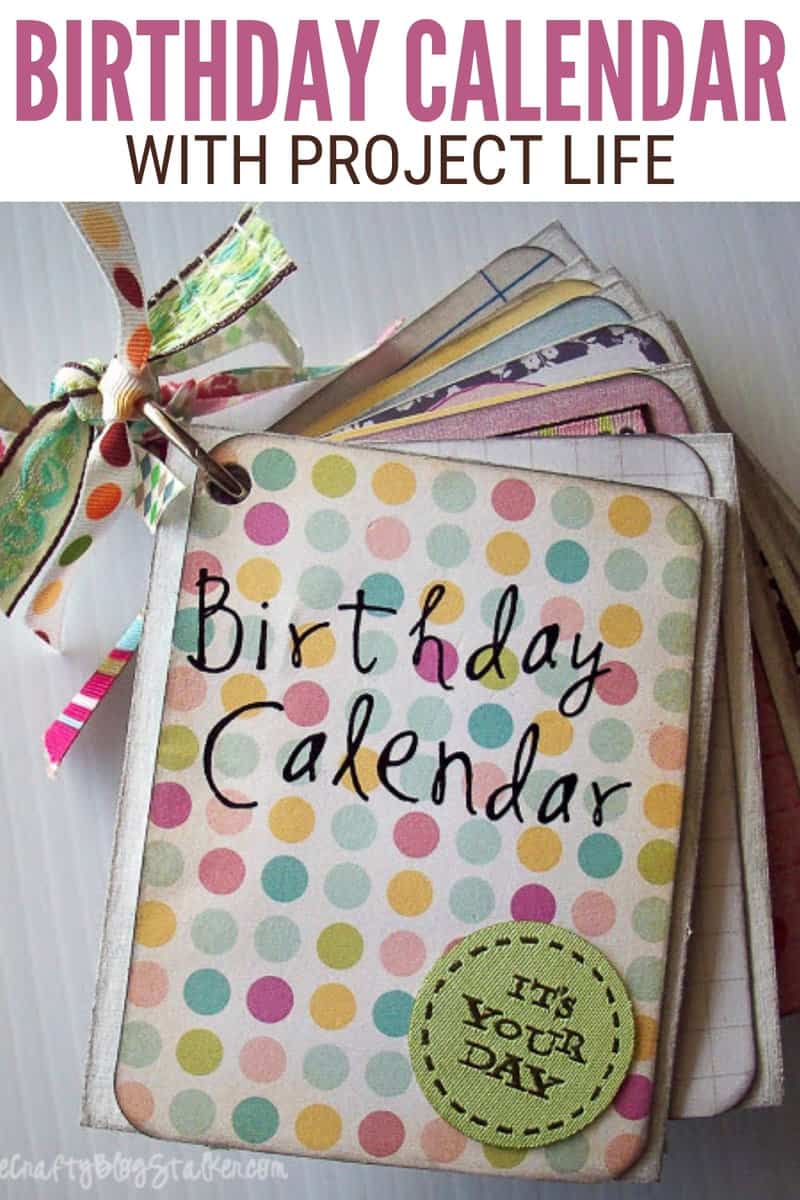
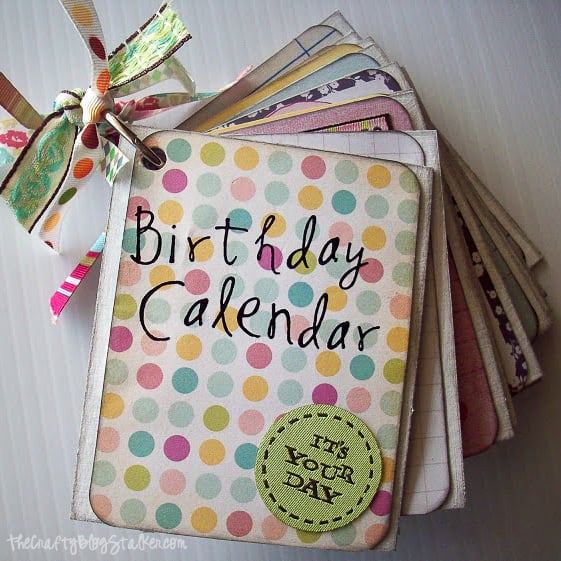
Tie some ribbon to the ring to finish off the Birthday Book.
Here are all of my pages.
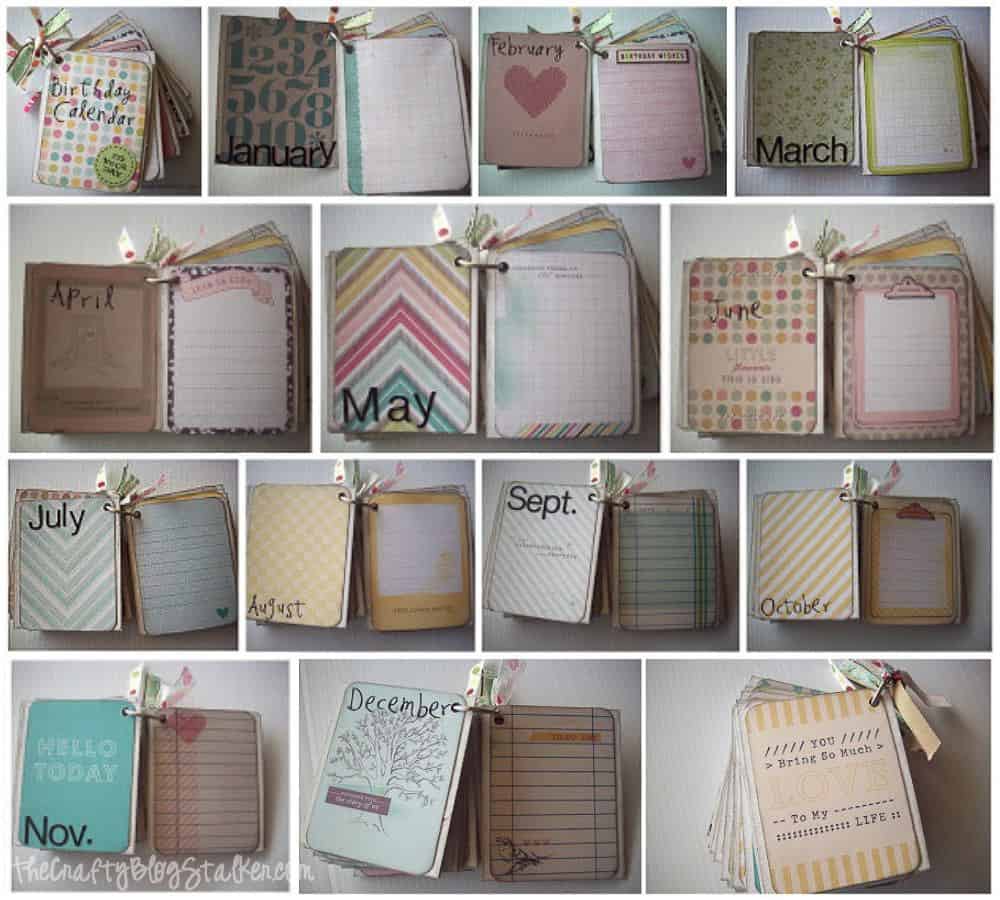
Isn’t it cute??!!
This would make a great gift or you can keep it for yourself.
Now all you need to do is write in the birth dates for each month!
Our Crafting Essentials List:
- The Cricut Cutting Machine is easily our favorite crafting tool. We use it in so many of our tutorials!
- This Fiskars Paper Trimmer is easy to use and cuts nicely without frayed edges.
- These Scotch Precision Scissors cut like a dream and you get multiple pairs in a pack!
- Keep those started project supplies organized and separated with Stacking Plastic Baskets. I always work on more than 1 project at a time and these baskets really help me from losing supplies.
If you love this tutorial, please give it a five-star review and help me share it on Facebook and Pinterest!
Birthday Month Calendar Mini Book with Project Life
Use a Project Life Kit to create a Birthday Month Calendar Mini Book. A complete step-by-step tutorial!
Materials
Instructions
- Cut the pieces of chipboard into 13, 4 x 3 1/2 inches rectangles.
- Punch a hole in the upper left corner of each chipboard piece. Making sure that the hole is in the same spot on each piece so they line up.
- Paint the edges white and let dry.
- Look through the Project Life Kit and choose 26 of the small papers.
- Ink the edges of the paper if you would like. This adds dimension but is completely optional.
- Adhere the first paper on the first chipboard piece.
- Before you tape the second paper on the back be sure to use the hole punch to punch a hole in the paper.
- Now put your back piece on and punch your hole again.
- Repeat until all of the papers are on your chipboard.
- Place all of the pages on the metal ring.
- Using the rub-on letters, add the title and months to the pages.
- Tie some ribbon to the ring to finish off the Birthday Book.
Notes
If you love this tutorial, please give it a five-star review and help me share it on Facebook and Pinterest!


Follow The Crafty Blog Stalker

The post Birthday Month Calendar Mini Book with Project Life appeared first on The Crafty Blog Stalker.