

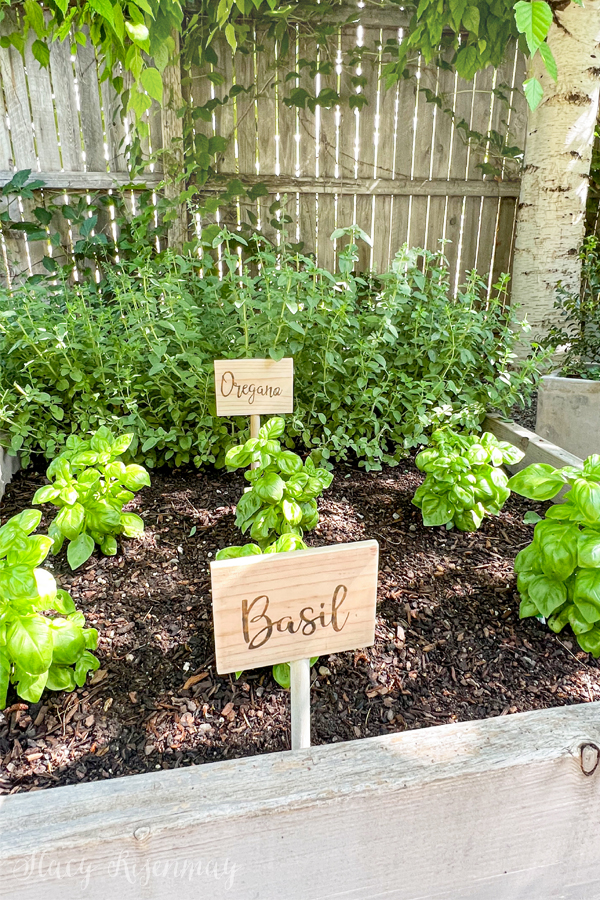
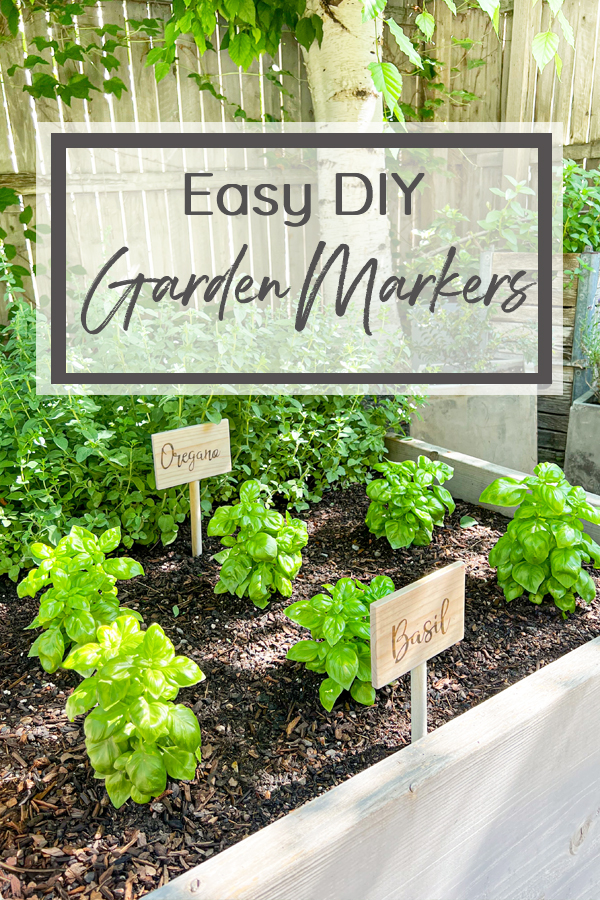
My secret garden is one of my favorite spots. I have enjoyed it so much more since adding raised garden bed and turning it into an herb garden. But one thing was missing... I have garden markers in my vegetable garden, but I have not gotten around to adding them in my herb garden. Until now! The garden markers I use in my main garden are too big for my smaller raised beds so I came up with some cute DIY garden markers. These are a great way to finish off your outdoor space!
This post is sponsored by HomeRight/Wagner but all project ideas and opinions are 100% my own. This post contains affiliate links.
DIY Garden Markers
Supplies:
Stencils (Optional)
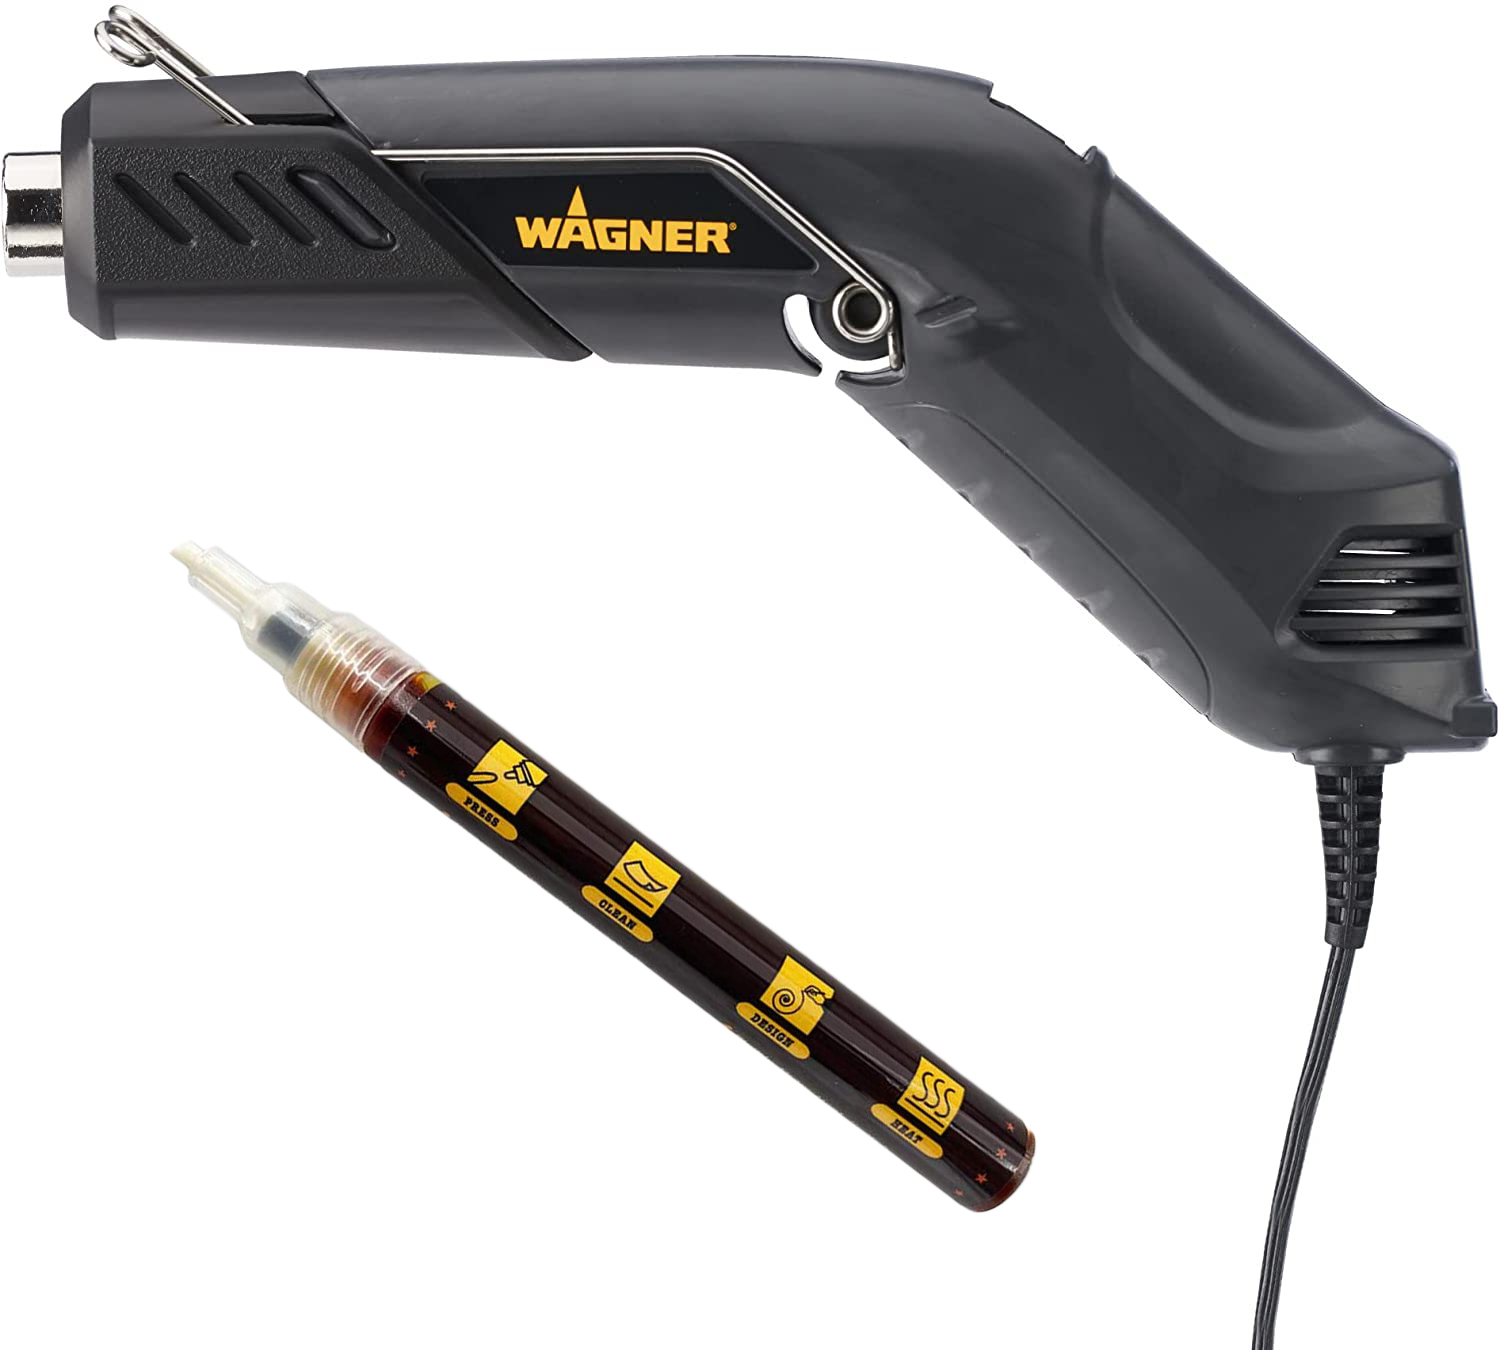
I have done several wood burning projects over the years so you all know I am obsessed with that fun tool. I have always wanted to try my hand at using a wood burning pen (AKA a scorch pen). Wood burning pens contains a non-toxic liquid that reacts to heat. I already have a hand dandy heat gun that I use to remove old paint and to remove bubbles from resin, so I just needed to order a pen. I knew this would be the perfect project to try out the pen. A love a fun and easy project!
Sand the Wood Pieces
Originally I was going to order some little craft wood pieces to do this project but we are currently working on cleaning and organizing our garage and was reminded of how much scrap wood I have. And you know I love to use what I have on hand for projects as much as possible, so I opted to use 1x4s. But since they are really thick (¾ inch), we cut them in half so they were thinner. You can choose to use different sizes other than 3x5 for your markers. You could even use wooden spoons! How cute would that be?! I sanded them really well. Sanding the wood with a fine grit sandpaper helps the pen not bleed. Soft wood like balsa and pine have a tendency to bleed more as well. So please don't skip this step! Wipe off with a rag to remove the dust.
Add Your Stencil
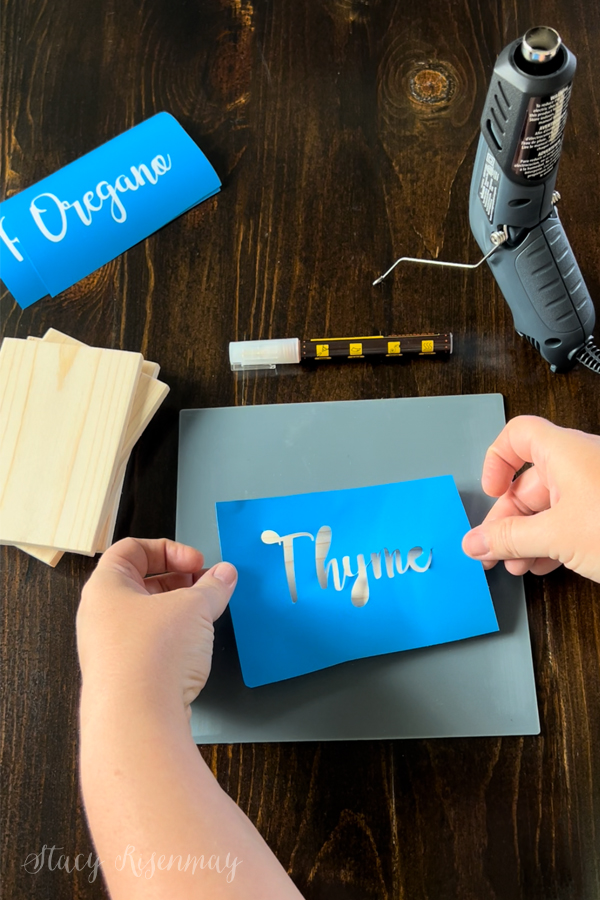
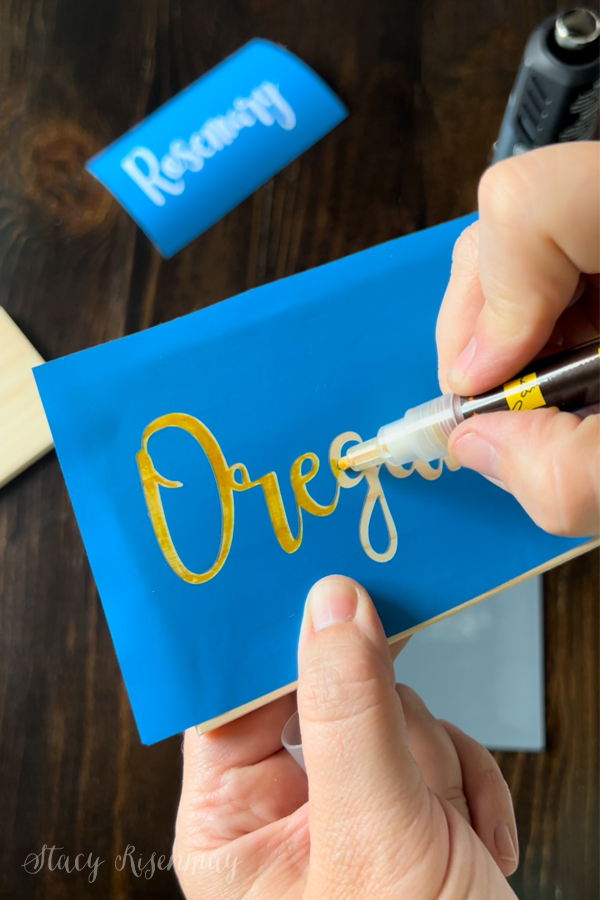
I have terrible handwriting so I opted to use a stencil. I did play around with the pen on some extra wood and found that writing with it was super easy, so don't feel like you have to use a stencil. My cricut maker came in handy to cut out some vinyl. If you do use vinyl, make sure to press down along the edges really well.
Prep Your Pen
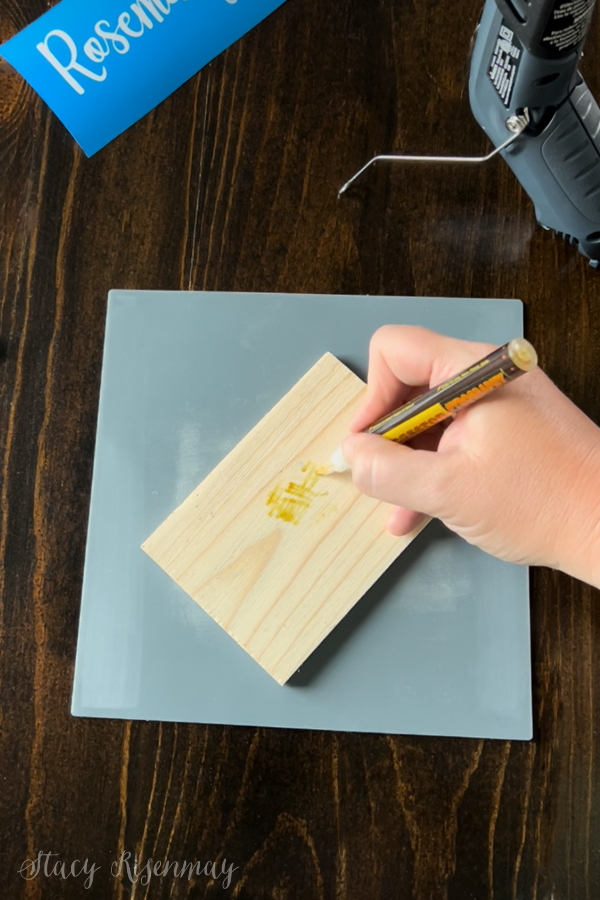
This step is vital to avoiding bleeding. When you get a new pen, you need to press down a few times to get the liquid to come out and saturate the tip. Don't immediately start using it though! It will bleed and look horrible. Don't ask me how I know.... On a scrap piece of wood, start scribbling until the ink is slightly faded.
Now you can start filling in your stencil or writing on your garden markers.
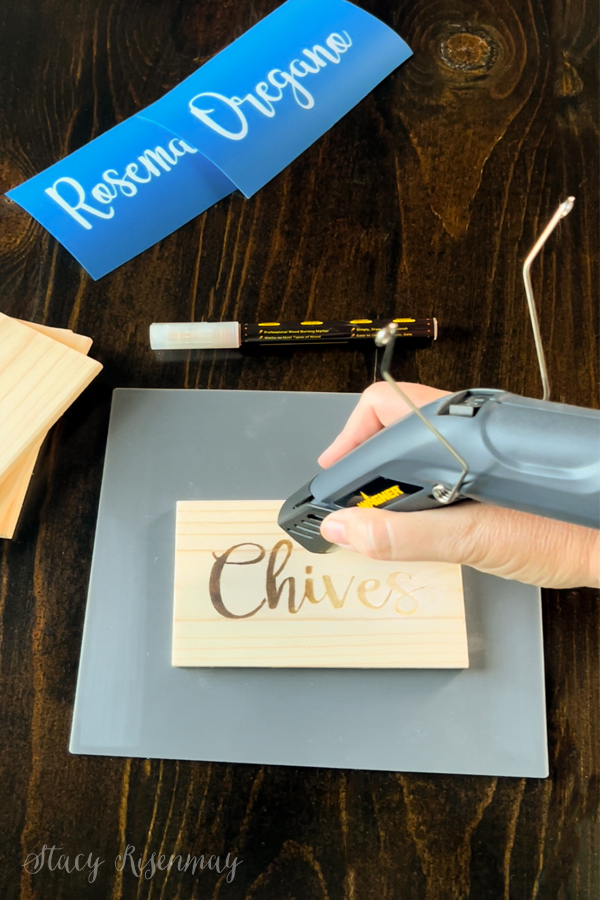
Remove the Stencil
Remove the stencil before you start heating. I was so excited to grab the heat gun and see the change that I almost forgot to remove my vinyl! If you remove the stencil and there was some bleeding, I'll give you a little tip.
TIP: It is easier if you go ahead and wood burn it and then sand it off than it is to try and sand the liquid off. The liquid doesn't really dry so sanding it just spreads it more. Wood burning it with the heat gun and then it will sand off fairly easily. Then you can try again and not waste a piece of wood.

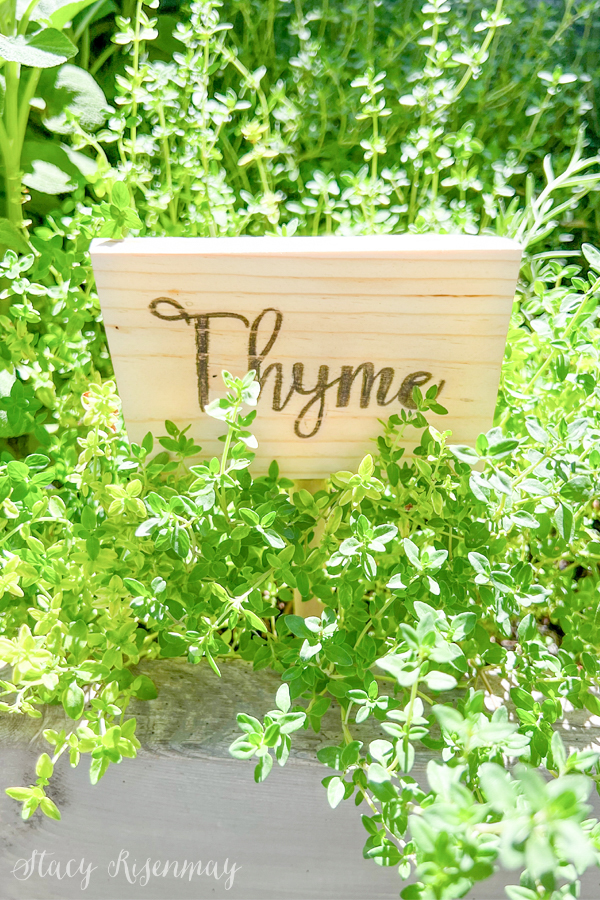
Wood Burn!
This is the super fun part. I have a large heat gun for bigger projects, but I love my smaller Wagner HT400. It is perfect for crafting projects like this. Hold it about 3 inches above the wood. first started out with it on low since I had never done this before and wasn't sure how much heat was required. Low worked but it took a bit longer than when I turned it to high. I liked how fast it was with it on high. I was wishing I had more than 6 to make since it was quite addicting using the heat gun and watching the change right before your eyes!
The HT400 craft kit comes with a silicone mat to protect your work space. I have also used a scrap piece of sheet metal before to protect my wood table top.
Add the Dowels
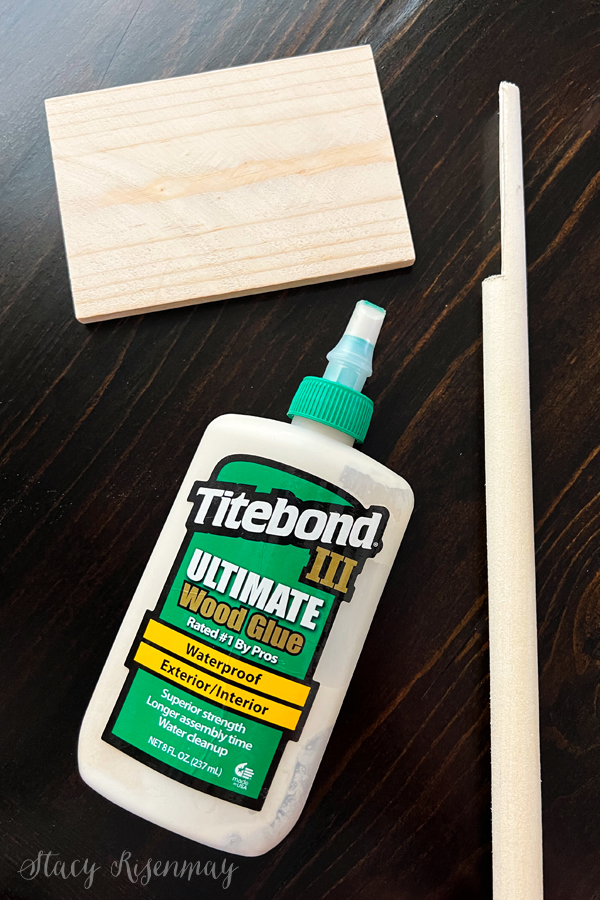
I used ⅝" wood dowels for the garden stakes, but you could also use paint sticks. I didn't have enough of those lying around or else I probably would have used them. While I was wood burning, I had my son cut the dowels in half about 3 inches down so that I could glue them to the back of the marker. Use a waterproof wood glue that says it is meant for exterior use.I like TiteBond and Gorilla Glue. I added some masking tap to hold them on while the glue dried.
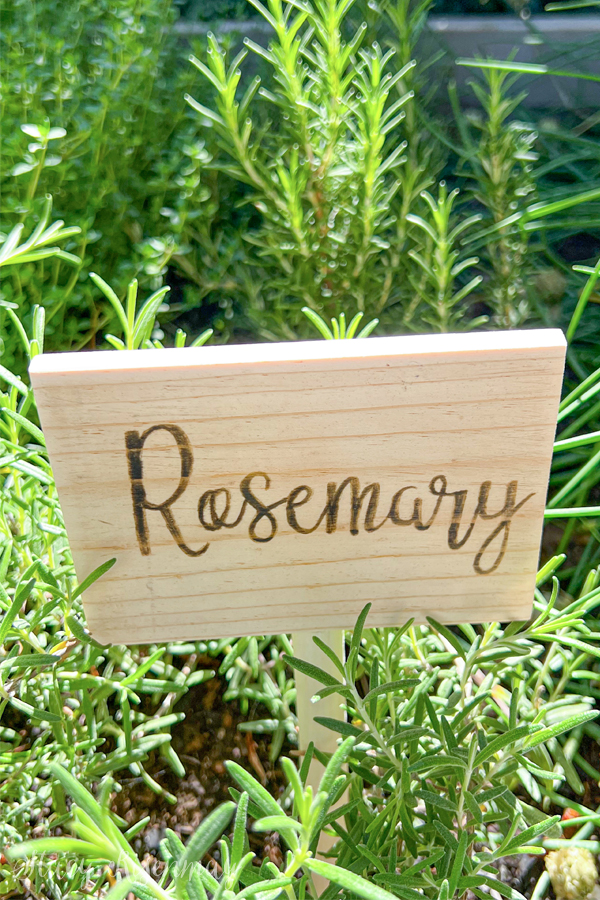
I love these little garden herb markers! They look so cute tucked into the herbs in my container garden. I add garden markers because of the aesthetic, but in this case, they actually serve an additional purpose because when I'm cooking and send my boys out to cut me some herbs, they sometimes bring me the wrong one. The best part of having my herb garden, is that it has actually made my boys more interested in learning to cook. Their favorite one to use is chives.
These simple garden markers add so much to my favorite little space. If you are interested, I have a video tutorial on instagram and youtube you can watch as well.
In the past I have shared similar wood garden markers that my kids helped decorate with colorful paint. And you can catch a glimpse of my metal plant tags in my veggie garden that I added vinyl to in this blog post.
Thank you for letting me share my own DIY garden markers. Do you use garden markers? Have you ever made diy plant markers before? I would love to hear about what you use in your outdoor garden space and yard, and the fun ways you mark your plants! Let me know in the comments below :)