

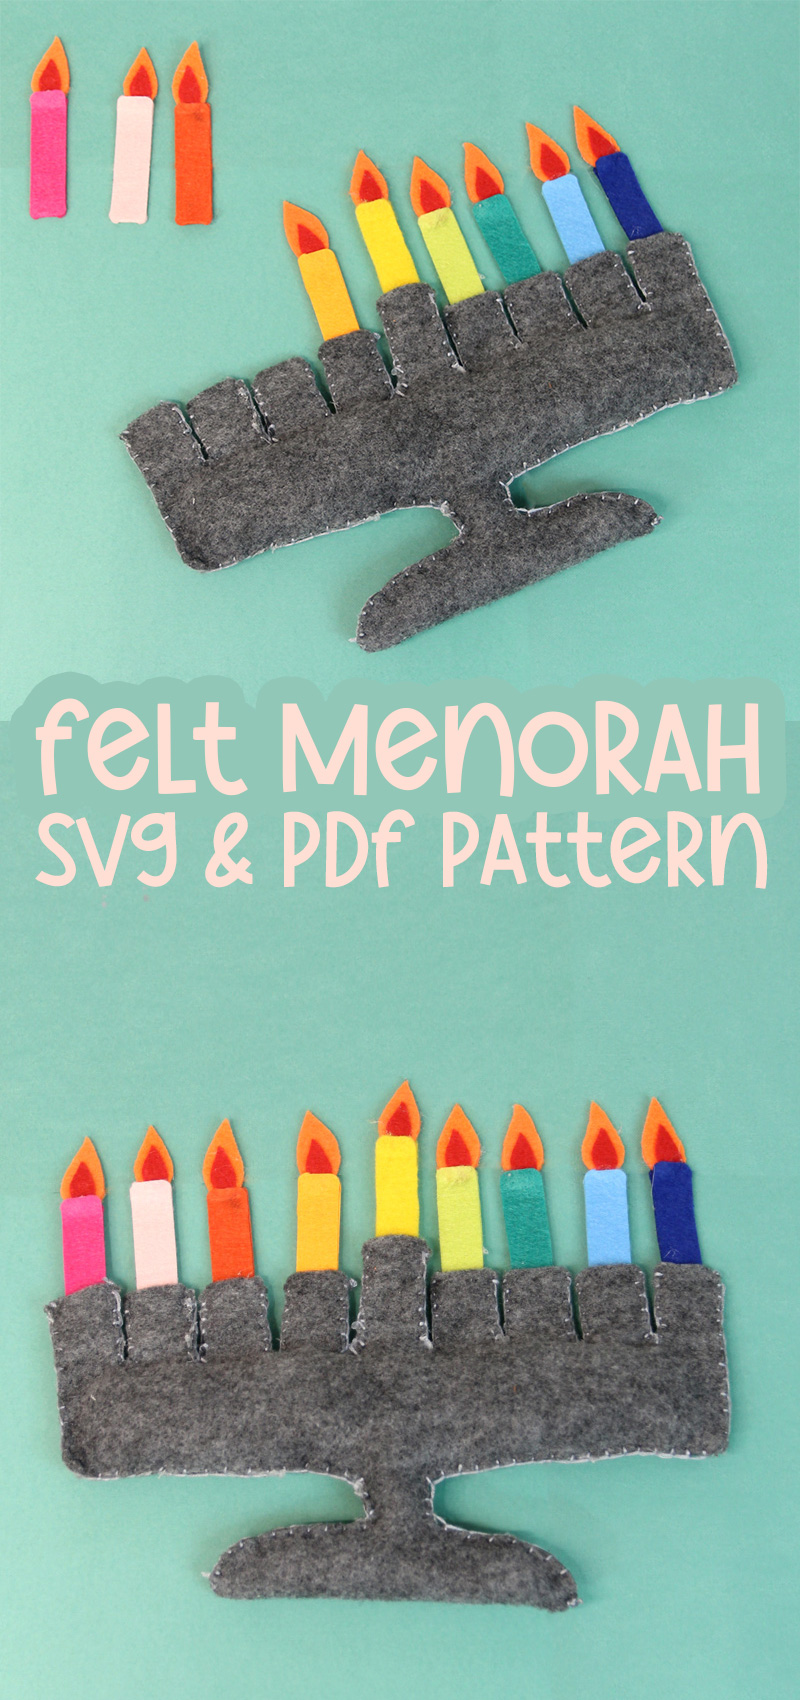
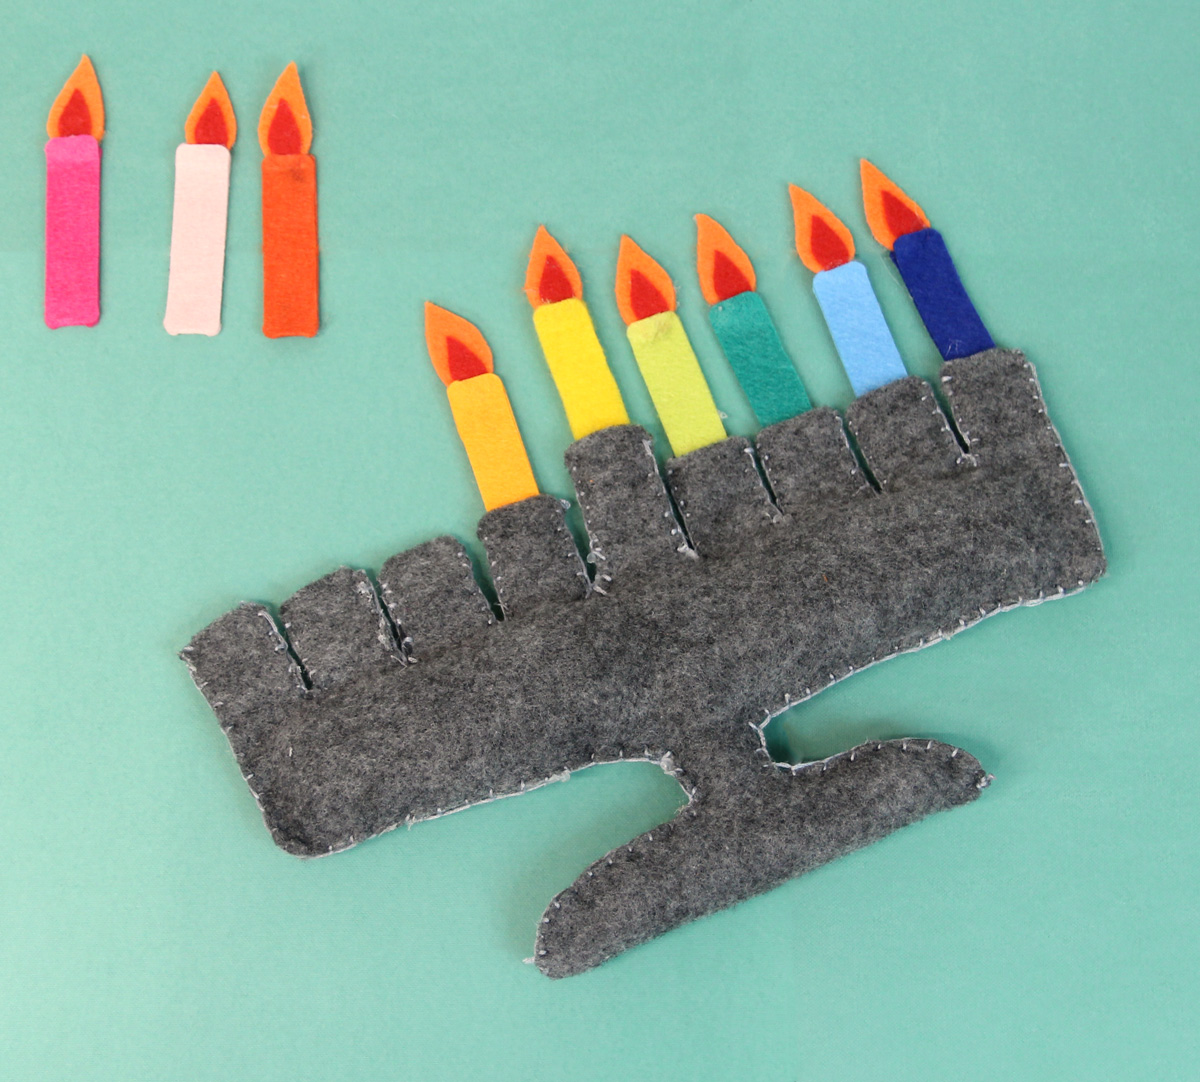
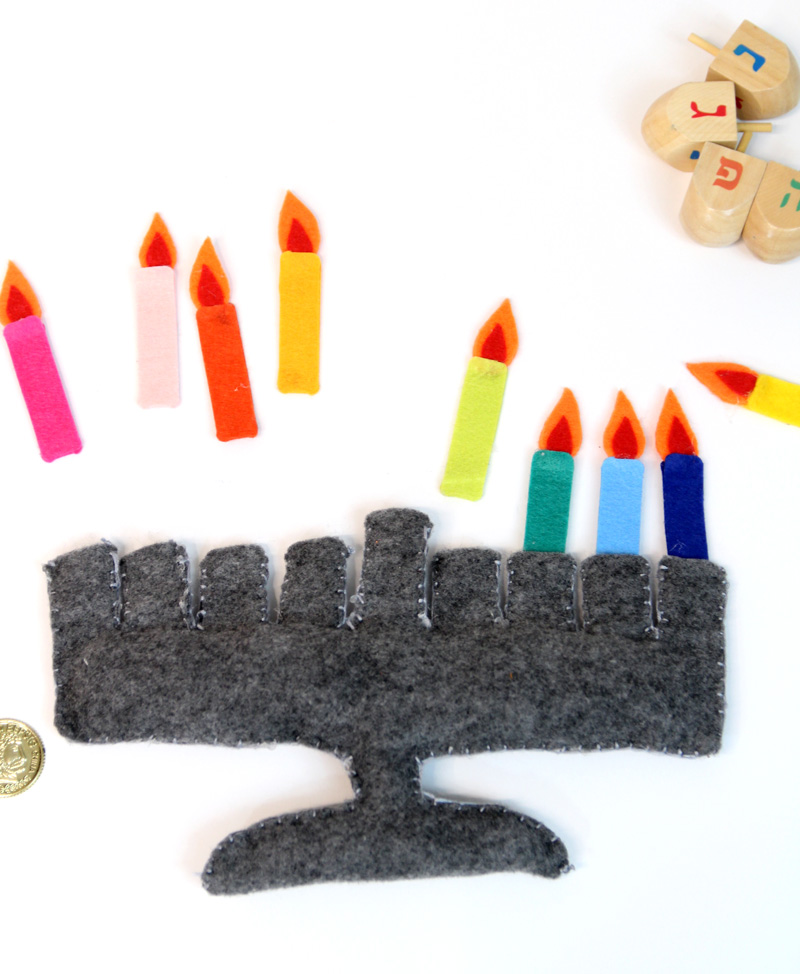
Use this felt menorah pattern to make a toy menorah for kids this Hanukkah. When you’re done, check out this tutorial for kids’ Chanukah candles. This post contains affiliate links.
It recently hit me really hard: I never made a felt menorah pattern. What?
A few years ago, I designed this felt seder plate, followed by a sensory, interactive Haggadah. I knew I had to make a Chanukah version.
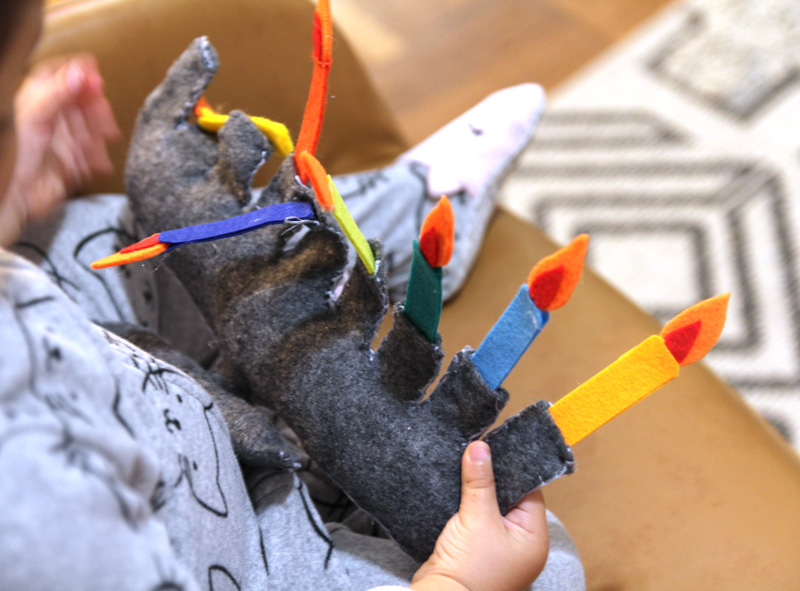
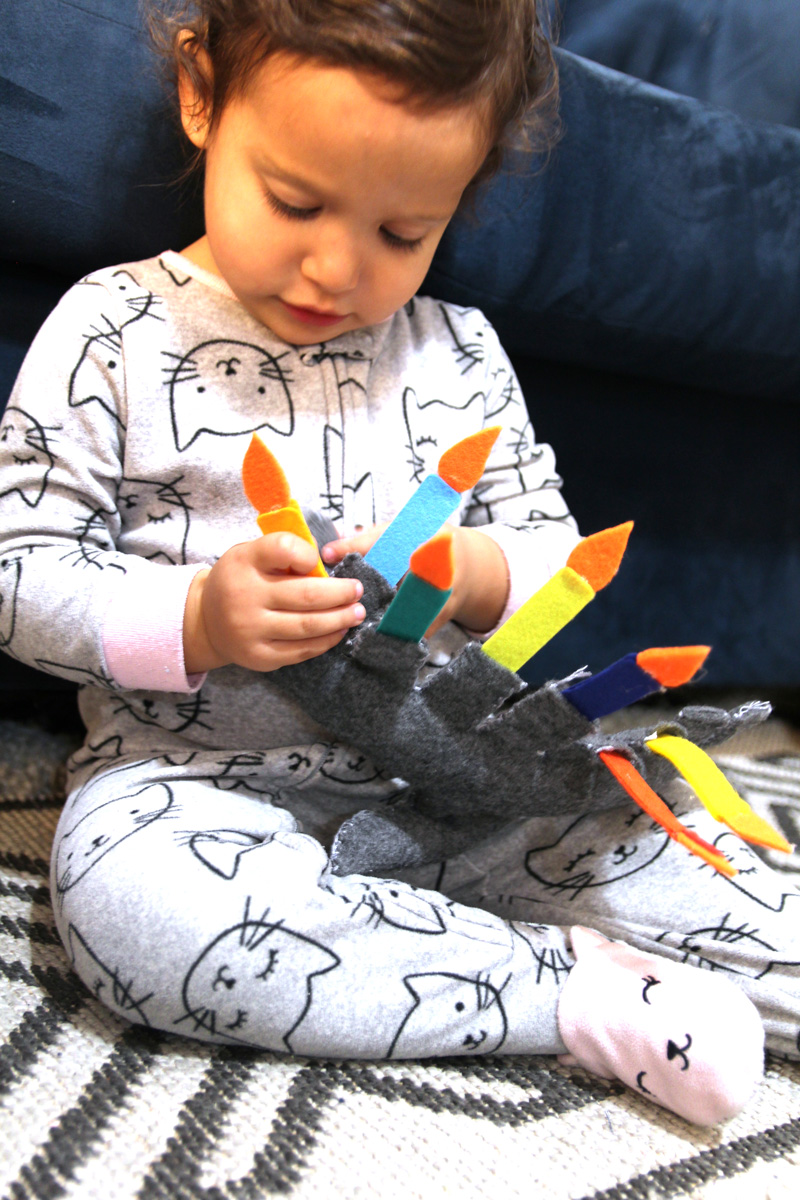
And since A is two, she’s the perfect age for it! She loves it and calls it her “cozy ‘nowah.”
Different ways to complete the felt menorah pattern
This is one of those crafts that warranted both SVG (machine, such as Cricut, cutting) and PDF (hand cutting) versions. It’s simple enough to cut completely by hand but definitely worth pulling out the machine for a more accurate finish.
And you don’t need to make it from felt! Here are some other ways to make a toy menorah using this felt menorah pattern:
- Use stiff cardstock for the candles only to make them easier to slide into the felt base.
- Use craft foam for the whole thing.
- Make chenille stem candles to use with the felt base.
- Glue the candles onto craft sticks for younger kids, to make it easier to slide in.
Felt is quite a clingy material, so you may prefer one of these instead.
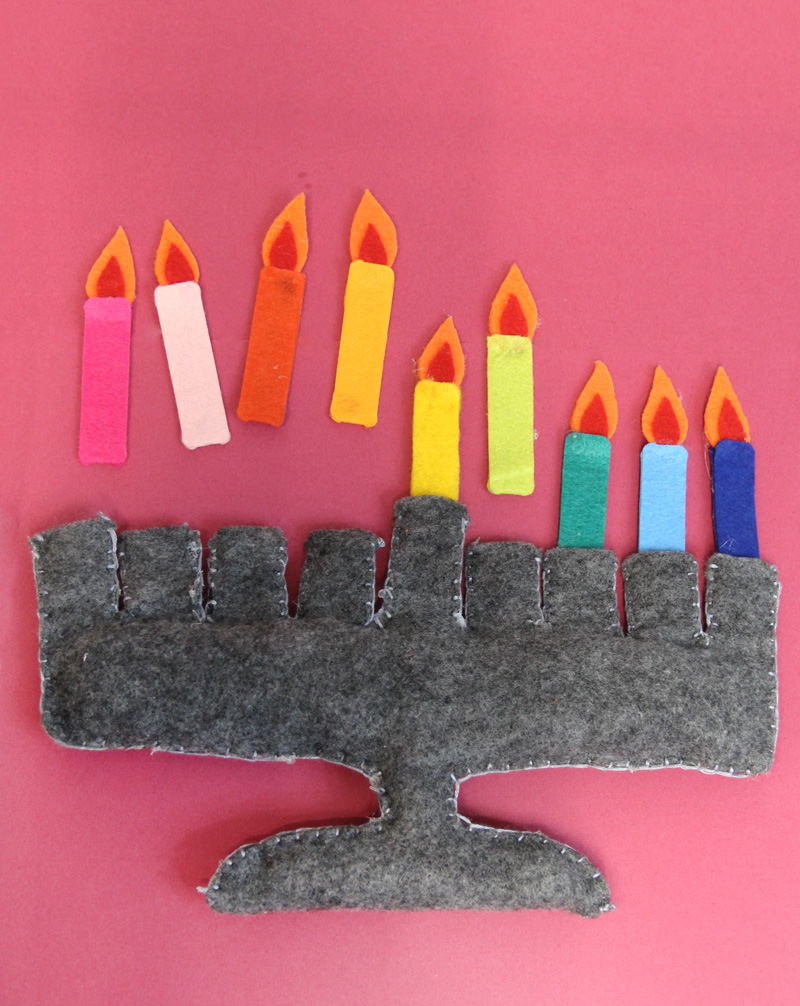
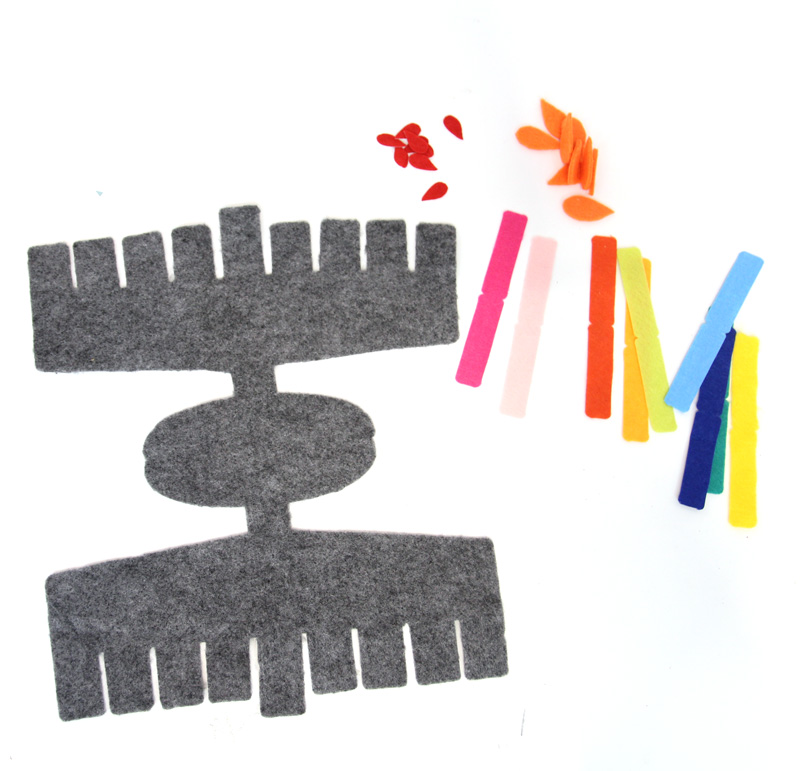
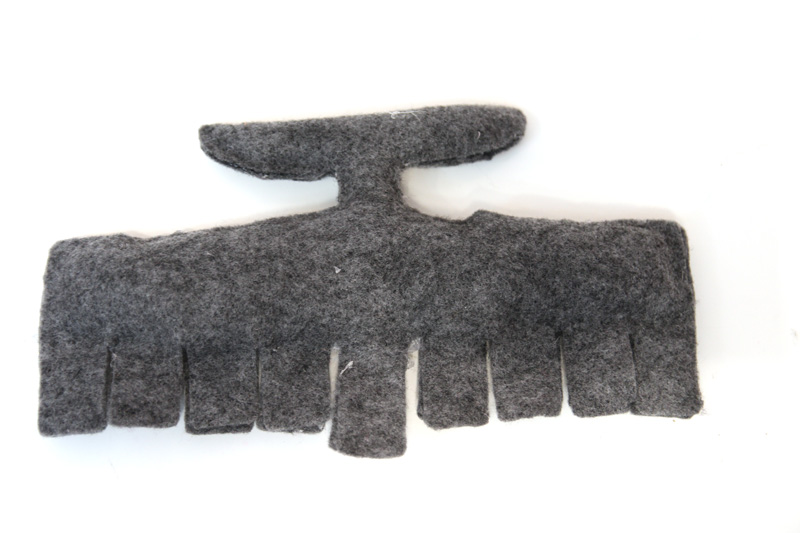
You also don’t need to make it as a 3D plush toy, like I did. I included two versions in the template:
- A two sided version. The PDF has only one side to the Menorah (due to page size limitations) but instructions to make it two sided.
- A flat version
You can mix and match what you do. If you’re using craft foam, you’ll want to use the flat version. Cardstock can go either way, since doubling it over makes it more stable.

I designed this to work as a quiet book pattern too. Just cut the flat menorah and make sure to leave pockets on each branch for the candles. Or, use hook and loop (such as Velcro) on the back to connect them.
This felt menorah pattern is really versatile and designed for you to use as you’d like.
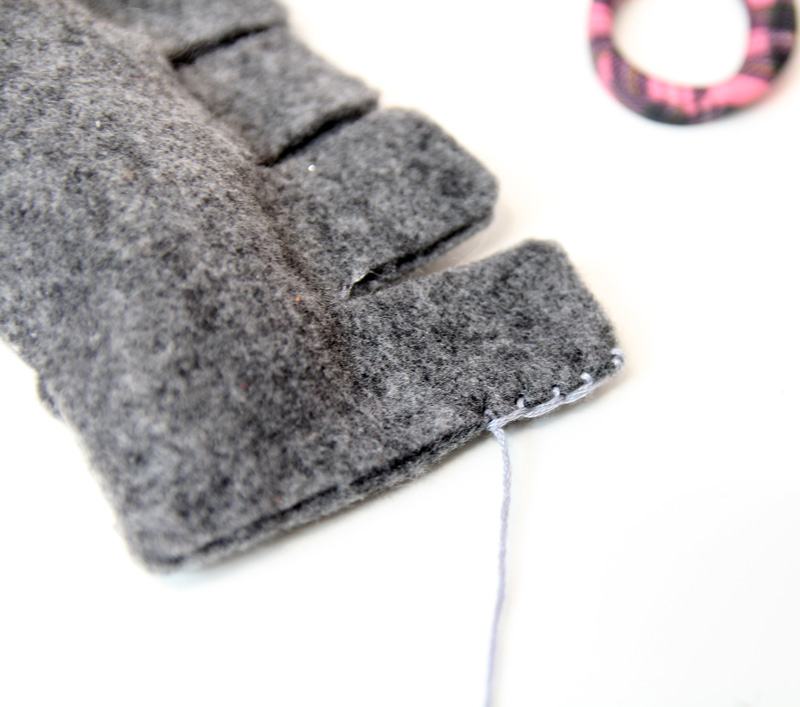
The pattern can be sewed, glued, or both. I only glued the candles and I glued then sewed (using embroidery floss) the menorah.

Download the felt menorah pattern
This is a premium pattern, available for personal and limited commercial use in my Etsy shop. Classroom or public/non-profit institution use is allowed in a crafting setting. Not for resale. You may craft it as a gift for 1-3 people, for your classroom and your friend’s classroom. You may not sell the template, share it, or redistribute it in any manner, or earn money off it in any way. If you would like commercial use to sell finished handcrafted felt menorahs, please reach out with details.
You get a PDF template, SVG cut file, plus PDF instructions. The PDF has only one side to the Menorah (due to page size limitations) but instructions to make it two sided

How to Craft this Felt Menorah Pattern
This is just instructions for the way I did it – use the pattern how you see fit!
Supplies needed
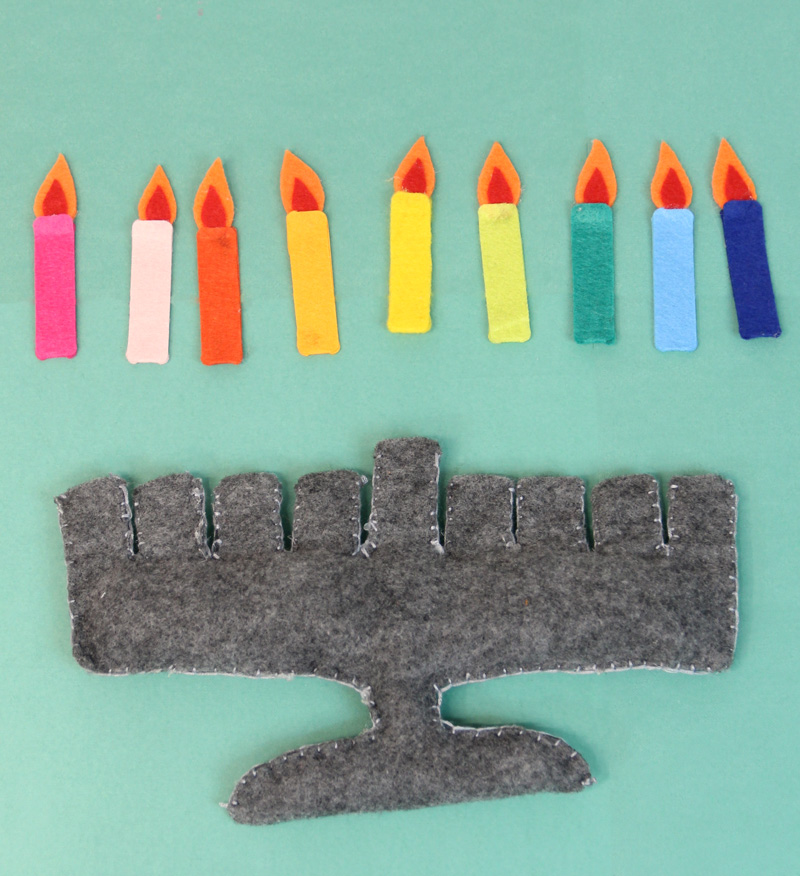
- Main Menorah Felt – if you’re folding it over, I recommend a piece at least 11×20 inches in size. If making plush like mine, opt for a soft, thick felt.
- Candles felt – remnants and scraps of stiff felt work best
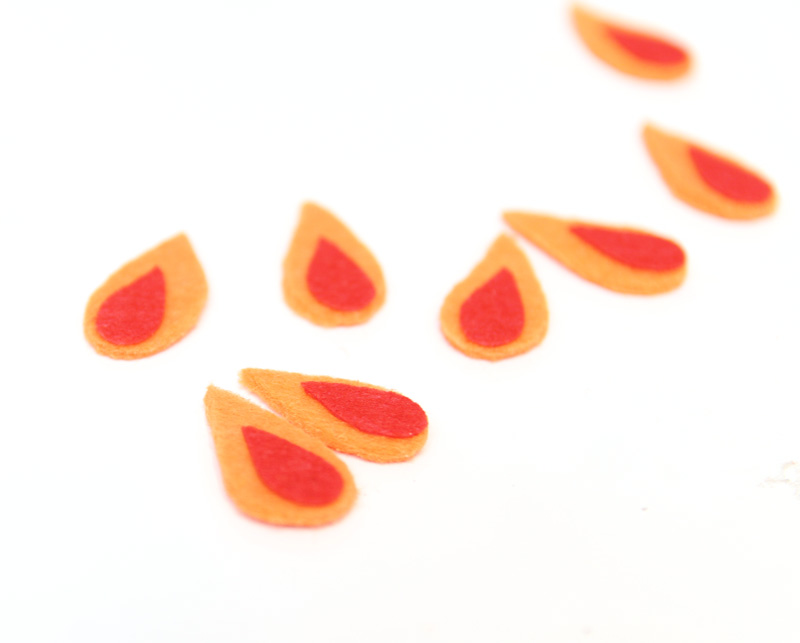
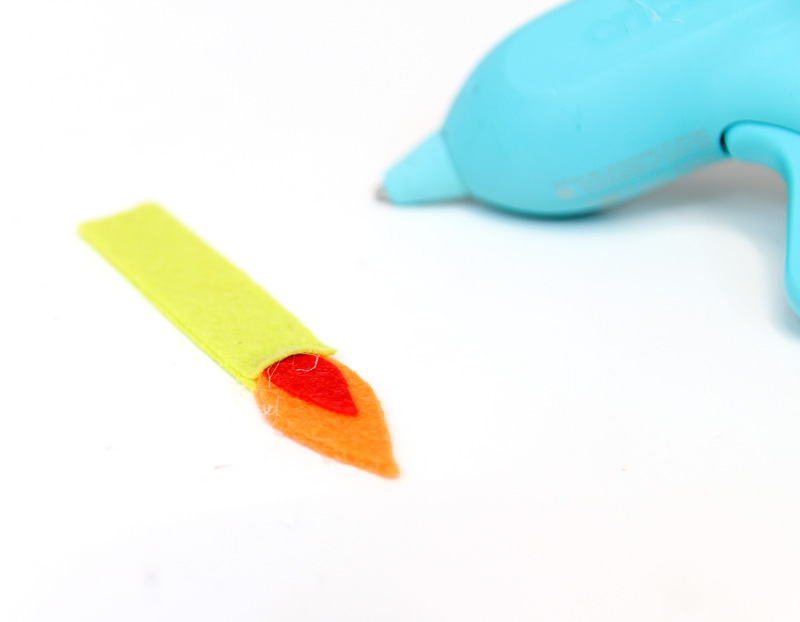
- Flames: I used very thick, stiff orange felt and red adhesive felt.
- Hot glue gun and sticks – I am in love with Cricut’s new glue gun. It’s easy to use for small details
- Optional: poly fil
- Embroidery floss in complementary color
- Embroidery needle
Cricut cutting supplies:
- Cricut Maker or Maker 3
- Fabric Grip Mat – 24 inch if making a doubled-over menorah. This withstands the rotary blade. Other mats get ruined.
- Rotary blade – note: I know felt goes with other settings too. I’ve consistently had best results using fabric settings and tools for cutting felt.
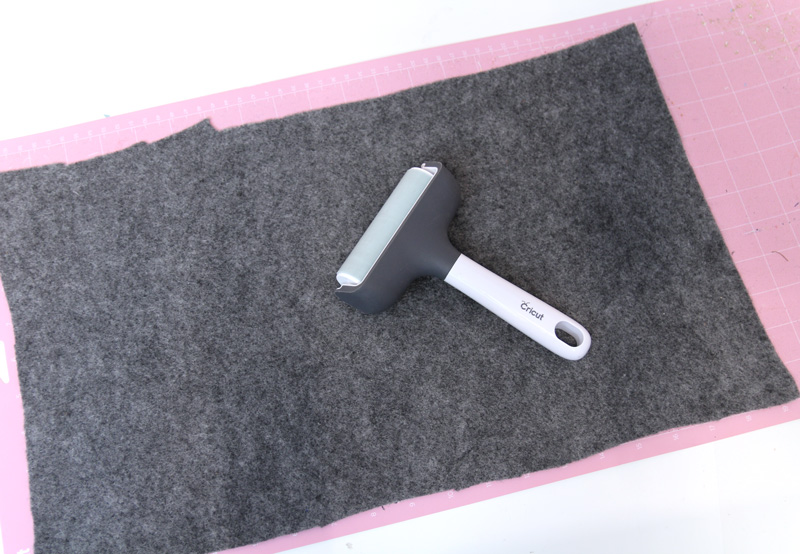
- Brayer
Hand cutting supplies:
- Good fabric and detail scissors
- Optional: tailor’s chalk or washable fabric marker for tracing the template
How to assemble it
Cricut setup:
Upload the SVG file to Design Space. Ungroup. Disable the layers you don’t need (choose flat or doubled for the menorah base and candles). Send to machine to make.
Cricut cutting:
Apply your material well to your mat using a brayer.
Cut using the rotary blade and the FabricGrip mat. When done, gently remove each part of your Menorah.
Hand cutting:
Trace your template onto the correct color felt and carefully cut out. If making a two sided menorah, fold your felt in half and trace the menorah so that the base sits on the fold. Cut it out and carefully unfold.
Assembly:
1. Glue or stick your inner flames onto the outer flames.
2. Sandwich it slightly between the two layers of felt at the top of the candle.
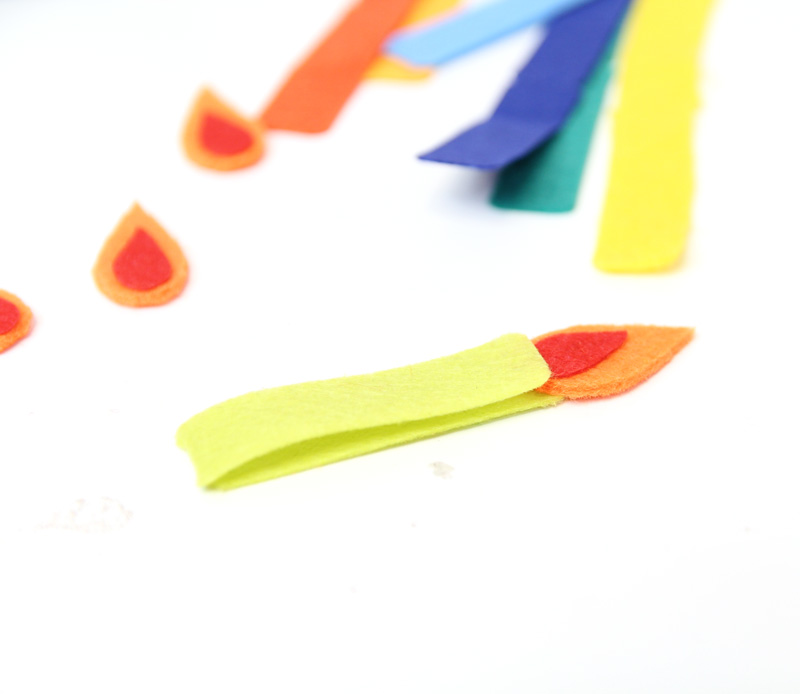
3. Glue your candle closed, securing the flame in place as well.
Repeat with all the candles.

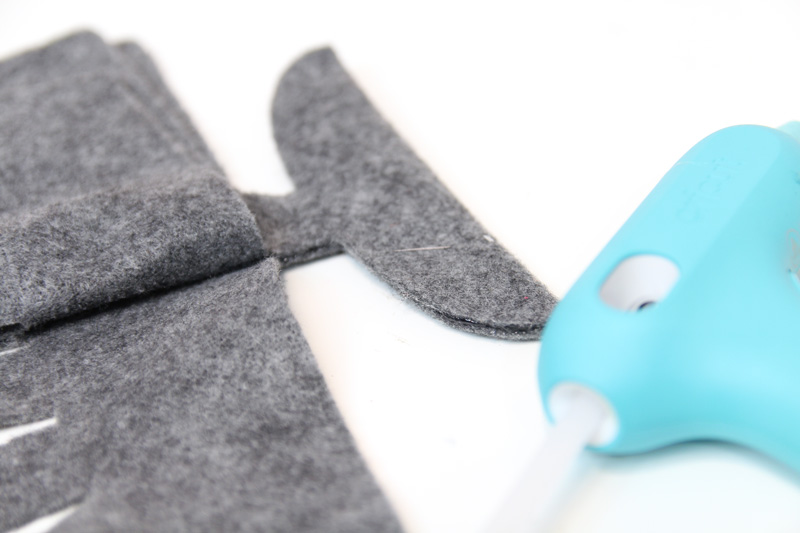
4. Fold your menorah in half. You can either glue it together flat, leaving the candle holders as pockets. Or glue just around the edges starting with the base.
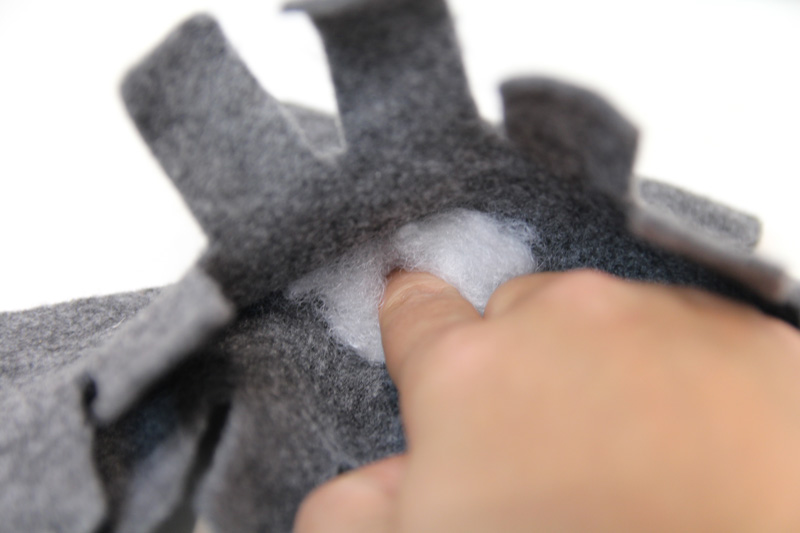
5. Stuff the base. Make sure your glue is totally dry before you start.
6. Now glue around the right side of the menorah. Glue at the base of the candle holders too.
7. Stuff the right side.
8. Repeat with the left side, gluing around the edges, including under the candle holders and stuffing it once your glue has dried.

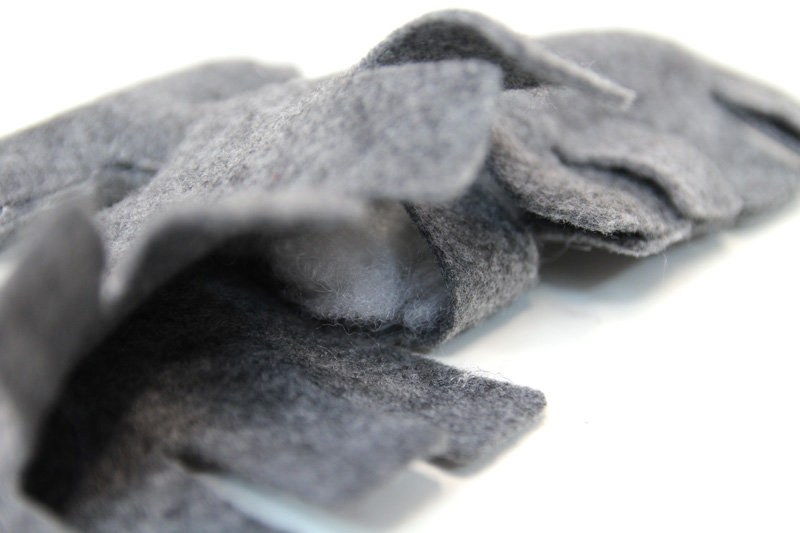
9. Add stuffing to the center, distribute it, and close off under the center Shammash candle. Your menorah should be fully glued around the edges besides for the candle holders that are still loose. I found it too hard to be accurate with glue there so that the candles can still slide in, but also didn’t need to pre-glue as those parts aren’t stuffed.
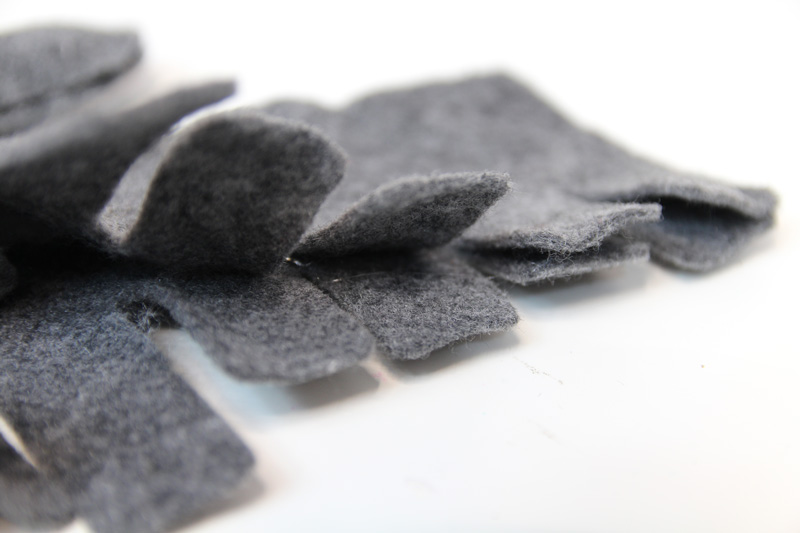
10. Sew around the outer perimeter, and between each candle holder/branch using a blanket stitch. Make sure not to go too deep into the candle holders so that you can still slide in the candle.
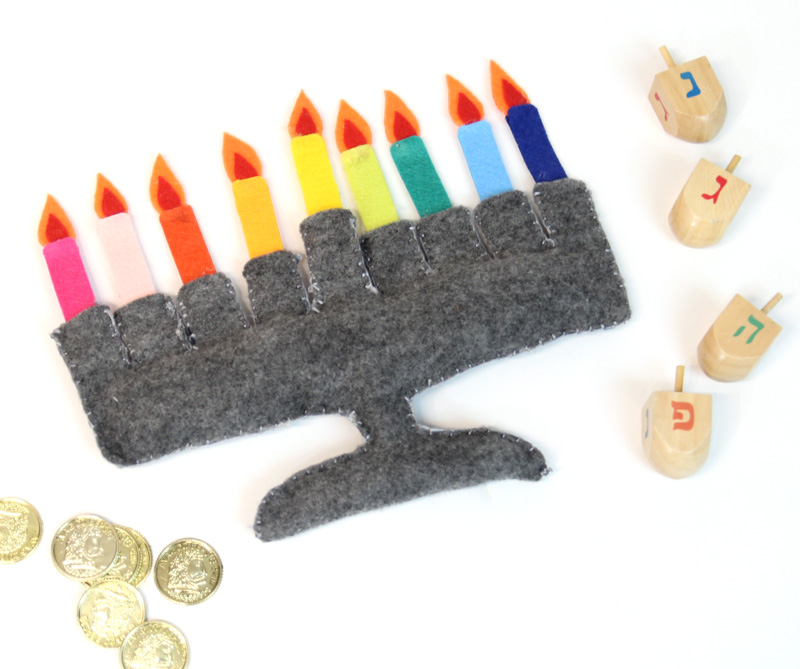
When you’re done, your felt menorah is complete!
The post Felt Menorah Pattern – Kids’ Toy Menorah appeared first on Jewish Moms & Crafters.