Is your daughter obsessed with mermaids? Here's a way to tap into her imagination. It's an easy way to craft a fishy tail with materials you have in your home. Find out how to make a mermaid tail using household items for your next playdate or party.
Related: Yoga for kids
Painting is one of her favorite things to do. So, she was over the moon about this project.
My daughter has been to the beach twice in her life, but those two times really made an impact on her sweet heart.
She can sit in the sand and look at the ocean waves for hours letting the breeze hit her face.
She's at home there.
I really love the look of pure joy in her eyes. I'm pretty sure she wants to be Ariel.
But, her signature song would sing, "I want to be where the mermaids are, I want to see, want to see them swimming..."
Ha!
But, really, she asks to go to the beach all the time.
I need to do a beach day (just the two of us). The boys in our house (they out number us) love the mountains. So, we go there more than the beach.
We live smack in the middle of both. We have the ocean two hours one way and the mountains two hours the other way. So, we are fortunate to be able to drive to either whenever we get a day or two to break away.
How to Make a Mermaid Tail Using Household Items
Since, we don't go to the beach as often as my daughter and I would love, I set up pretend play areas for her often.
We have a sand castle set that she uses in the backyard to dig and make sand castles.
I set out our blue picnic blanket so she and her older brother can pretend they're out to sea.
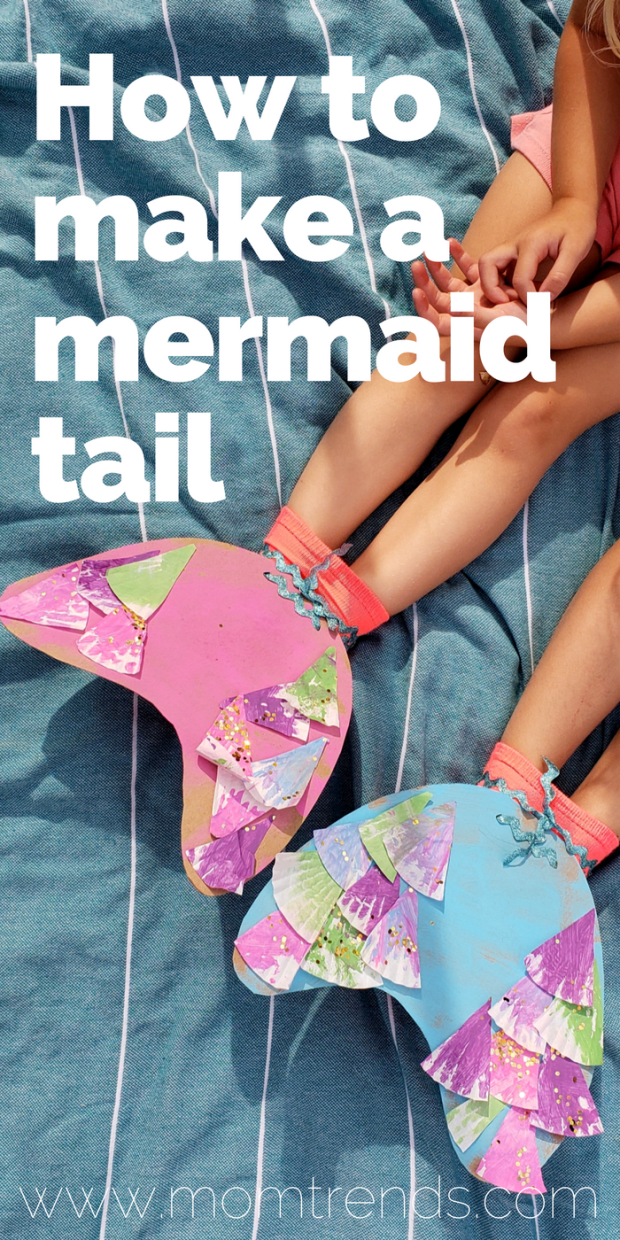
But, yesterday, she asked if she could be a mermaid. And since I don't have mermaid tails lying around, we planned out how to make one.
Painting is one of her favorite things to do. So, she was over the moon about this project.
Materials Need to Make a Mermaid Tale
We've added a few shopping links on Amazon, but many of the supplies should be found in your art supply at home. (note: these are Amazon affiliate links)
- empty cereal box
- white cupcake liners
- foam brush
- paint (mermaid colors: green, purple, blue, pink)
- glitter (optional)
- scissors
- pencil
- hole punch
- glue stick
- "rick rack" wavy ribbon
- sock
Instructions on How to Make a Mermaid Tail
- Cut the biggest side of a cereal box out. Then, draw a mermaid tail shape on the blank side. Cut the shape out.
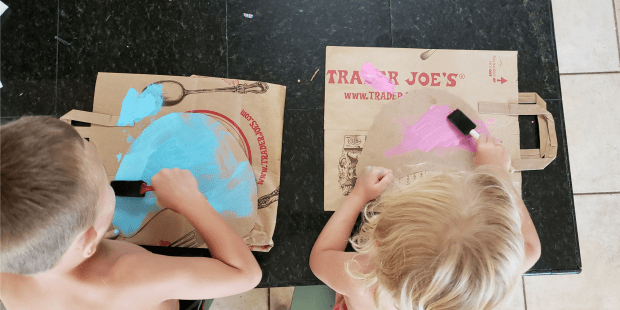
- Set up your child's painting area. Lay a paper bag on a counter with the cardboard mermaid tail on top. Squirt a dab of paint on the paper bag and hand her a foam brush. Have her paint the cardboard. Set it aside when she's done and let it dry.
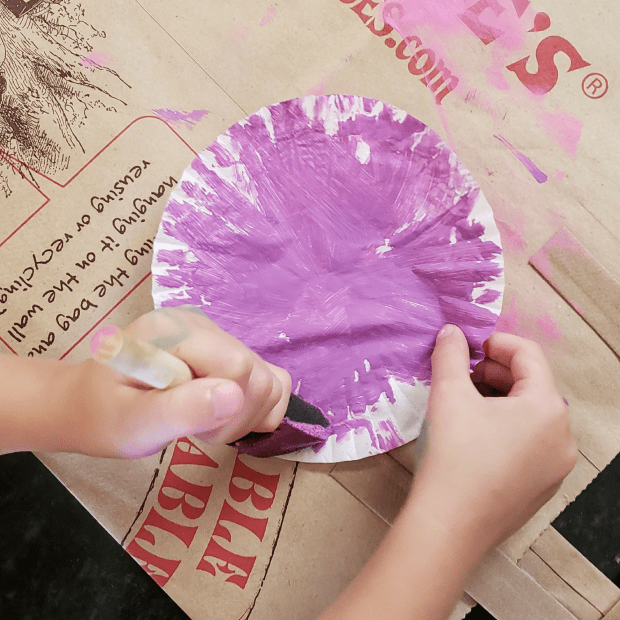
- Next, squirt a dab of paint in another color on the paper bag. There is no need to rinse the foam brush. The mix of the previous color and the new one will make it more mermaid-y. Then, flatten out a cupcake liner to have her paint.
- Sprinkle glitter on the wet paint that's on the cupcake liner. As it dries, the glitter will stay on.
- Repeat step 3 and 4 with a couple more cupcake liners using different color paint for each.
- Cut the painted cupcake liners like you're slicing a pizza. You will have little triangles with rounded bottoms.
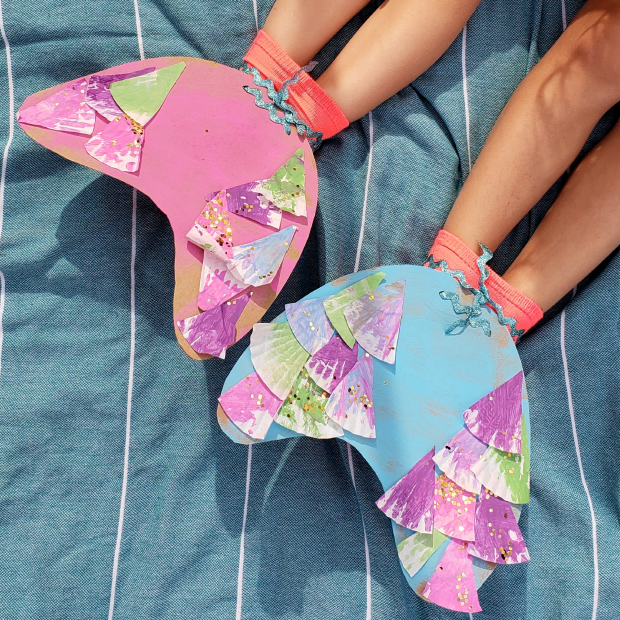
- Have your child, glue the triangles on the mermaid tail.
- Next, hole punch two holes at the top of the tail. Then, insert a ribbon long enough to wrap around your child's ankles.
- Have your child insert both of her feet into a sock and then tie the mermaid tail on.
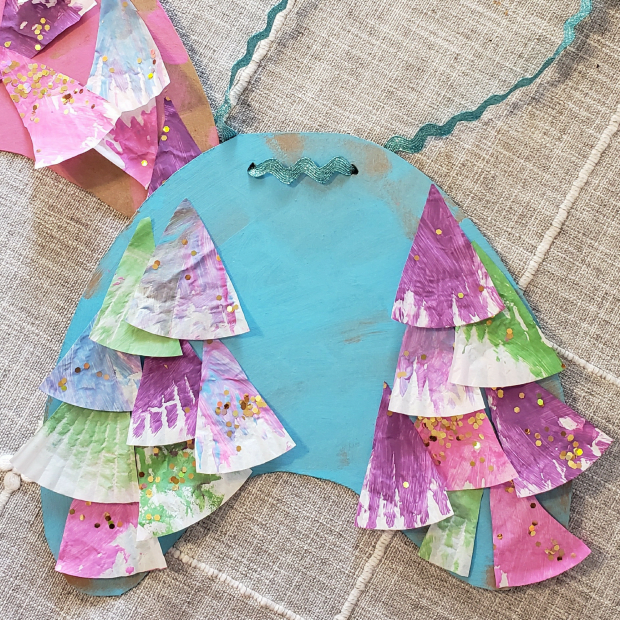
Voila! You have a mermaid tail!
I laid out our blue picnic blanket, so she could pretend she was swimming in the ocean. Later, we added some of her favorite stuffed ocean friends to the blanket for some more fun.
She had a blast!
When your child is done playing with the tail, you can hang the tail in her room as a decoration.
I hope you have so much mermaid fun!
MORE KID-CENTRIC FUN FROM MOMTRENDS
PIN IT!
Need more ideas on what to do with the kids? Be sure to follow our Activities to Do with the Kids board on Pinterest here.
