

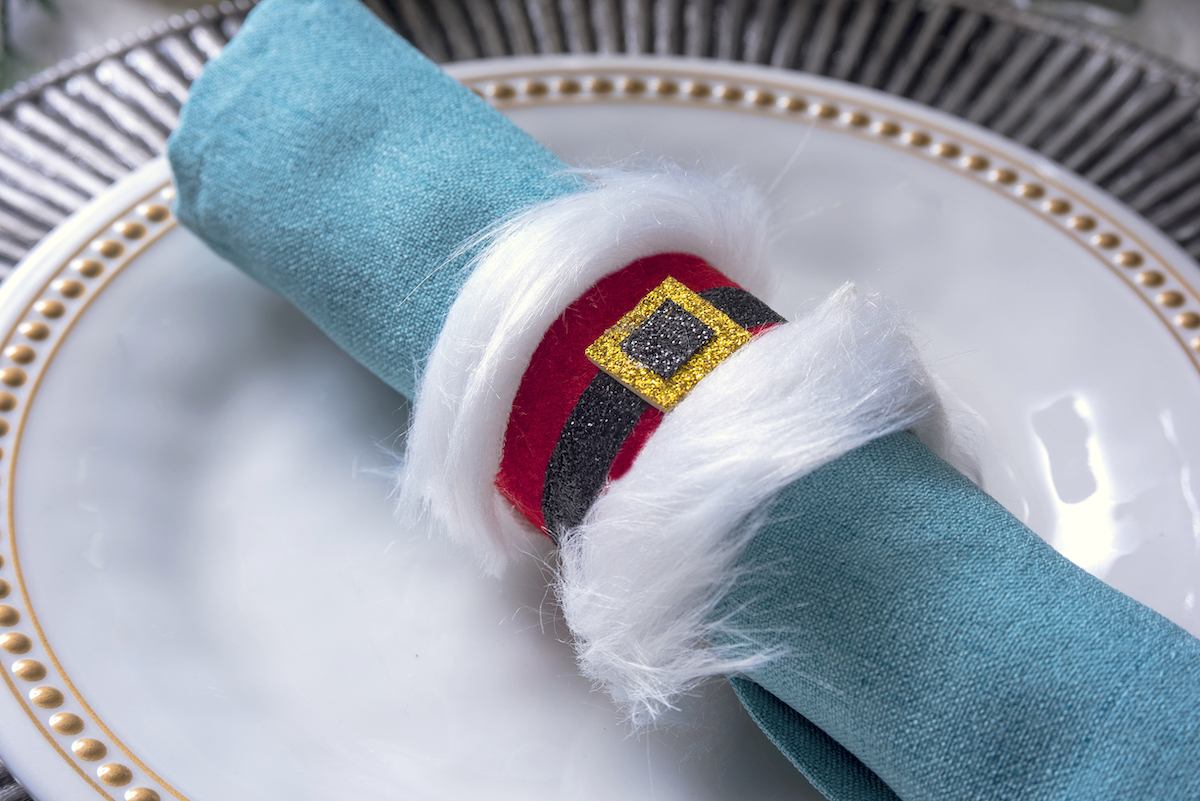
These Santa napkin rings will look so cute on your Christmas dinner table! Make them with inexpensive supplies including – perfect for beginners.
Skills Required: None. Even if you’ve never made anything before, you’ll be able to achieve this project. You’re using scissors/a craft knife and a hot glue gun to bring everything together.

It’s truly amazing, the things you can make with cardboard tubes. Let’s face it – “cardboard tubes” is the fancy name for toilet paper rolls. You know, the same ones that you put in the recycling bins on a regular basis or save for kids crafts.
Well I have a toilet paper roll treat for you today, my holiday friends. Because as it turns out, Santa napkin rings are one of those amazing things you can make with cardboard tubes! And they are really easy to do.
The premise is very simple, but these look like a million bucks on your Christmas dinner table. Sure, napkin rings are never required . . . but they do add a little something to the holiday festivities.
Given how fast these are to make, it’s not out of the realm of possibility that you could have several of these done and ready the night before Christmas. Yep, they’re that quick!
Santa Christmas Napkin Rings
You’re going to complete this project in five simple steps: cut the toilet paper roll, cut and apply the felt, add the belt, add the buckle, then add the first trim. And the first step is kind of a “half step.”
Honestly this holiday project is so easy that kids could make them. Maybe they want to make a set of their own for the kids’ Christmas table? Wouldn’t that be so cute?!
Learn how to make these Santa napkin rings below!
Gather These Supplies
- Toilet paper rolls – makes two napkin rings
- Red felt (about 2 x 6″ per ring)
- Gold glitter craft foam or ribbon (a small square per ring)
- Black glitter ribbon (about 6″ per ring)
- Faux fur ribbon or just faux fur fabric
- Ruler
- Craft knife
- Scissors
A few notes on substitutions before beginning. First of all, I got the fur ribbon at Hobby Lobby. So check out the ribbon section of your craft store, but you can also use faux fur from the fabric section as well. If you can’t find it, you can use regular white ribbon or pom pom trim, etc.
Also, I have a lot of gold glitter craft foam on hand (I have no idea, in case you’re wondering). But for Santa’s buckle, you can also use gold ribbon or even gold cardstock.

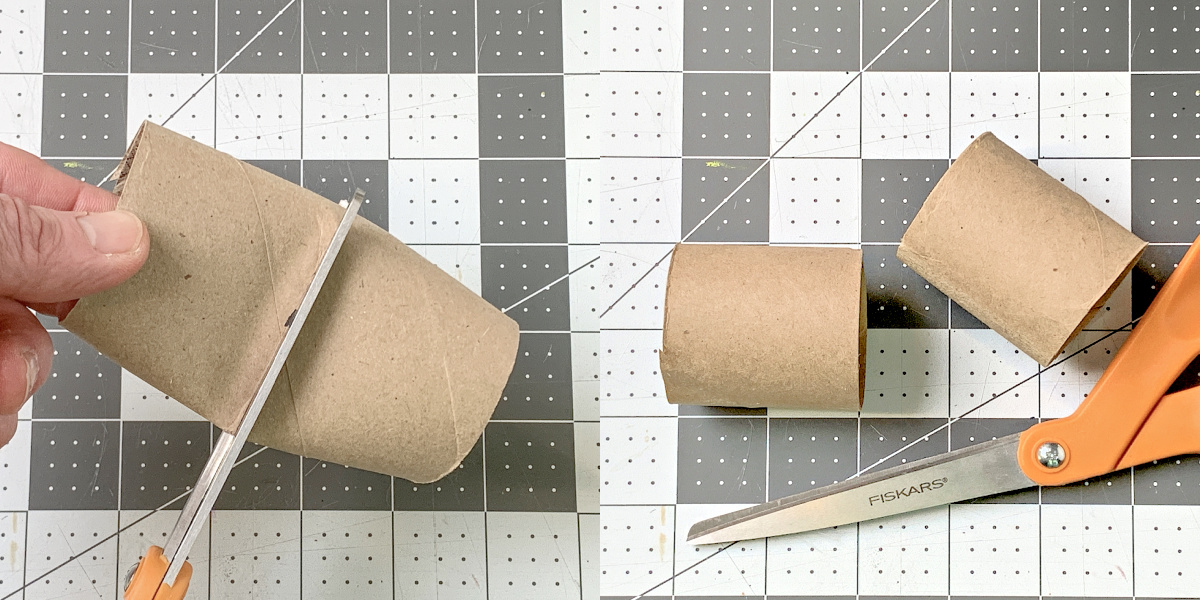
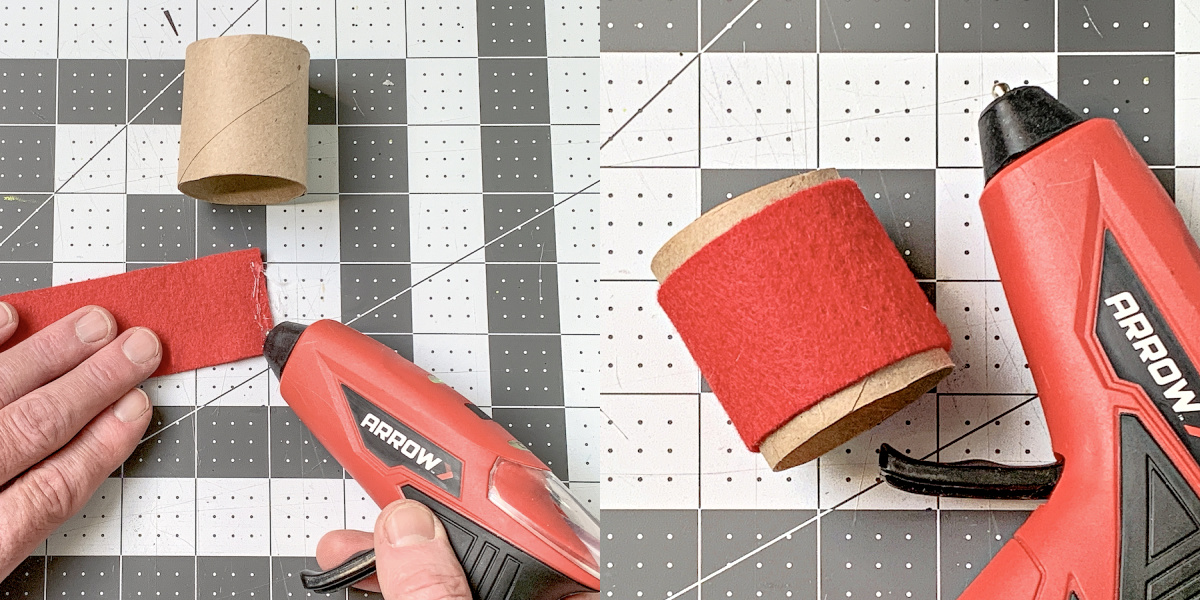
Cut the Paper Tubes
This is the simplest step in the whole project! Simply cut a toilet paper tube in half. The roll will bend a little bit while, you’re cutting, and then you’ll have to bend it back. Boom.
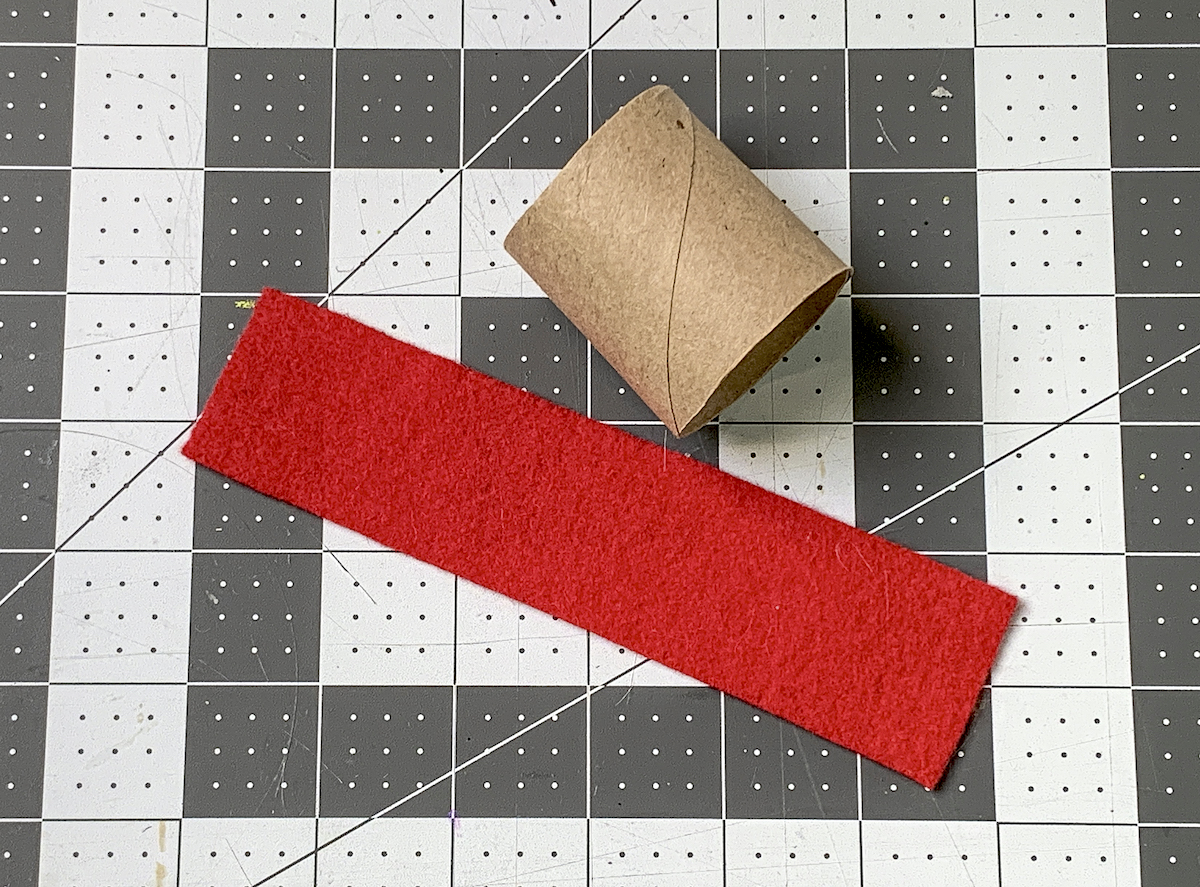
Cut the Felt Strip and Glue Down
Each piece of toilet paper tube is about 2″ tall and 6″ in diameter. So you’ll want to cut a strip about 1 3/4″ and then about 6 1/4″ for overlap. But measure your toilet paper roll, because I doubt they’re all the exact same size.
My felt is a little smaller than 2″ wide just because the fur is going to be covering the ends.

Here’s what you’ve got – half a toilet paper roll and a strip of felt.
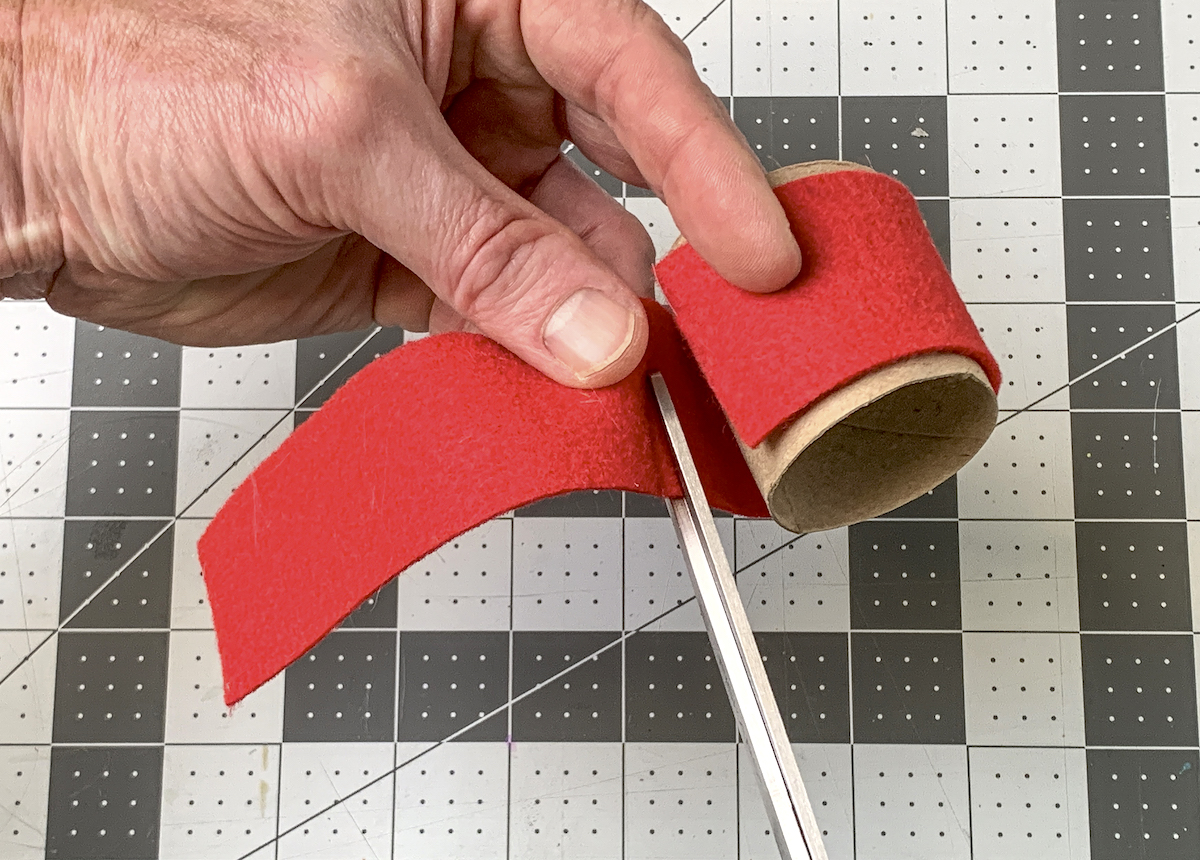
If your strip is too long for the paper roll, trim it down. You don’t want Santa’s coat to have too much overlap!
Apply hot glue to the red felt and wrap around the toilet paper roll. Secure the end with hot glue.
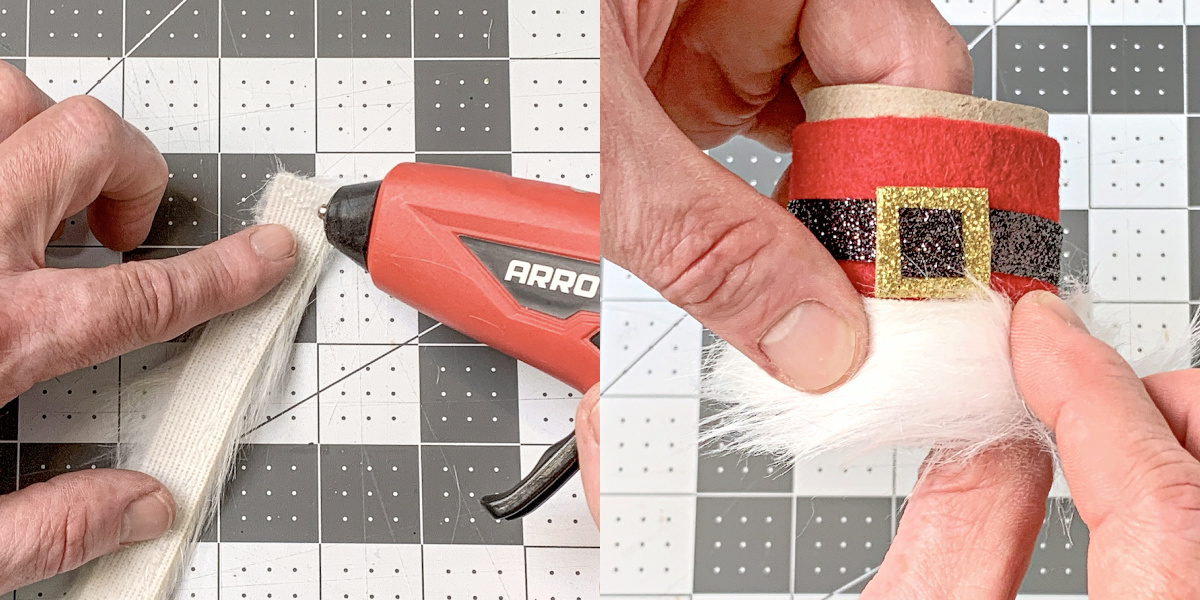
Make Santa’s Belt
Cut a length of black glitter ribbon to fit if it doesn’t already. I ended up having to cut mine in half with a craft knife and ruler because it was a little too wide.
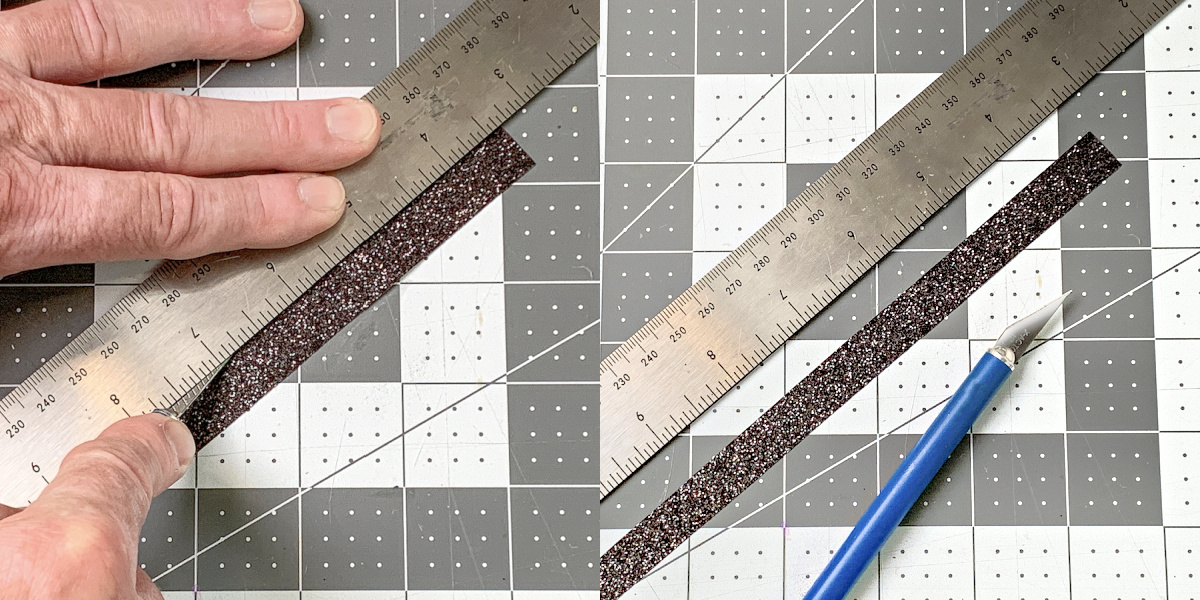
Add hot glue to the ribbon and wrap it around “Santa’s middle.”

Secure it on the other side, attach the ribbon to itself.

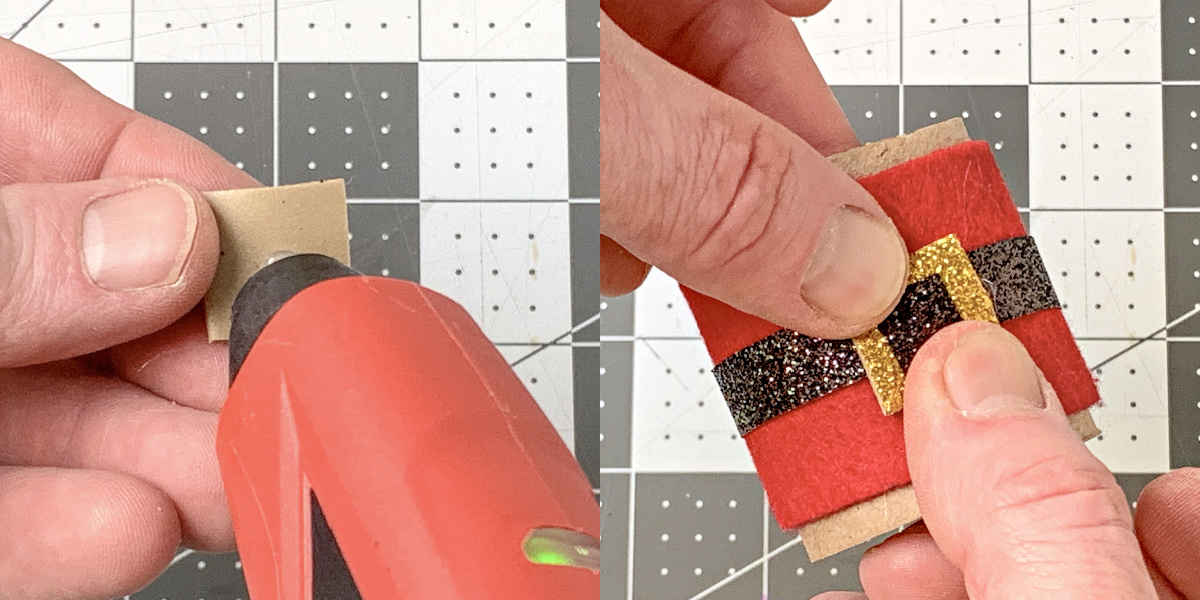
Create the Belt Buckle
Use a craft knife and ruler to cut a small square of gold foam or paper.

Cut a small square of black ribbon and attach it to the center of the gold square with hot glue.
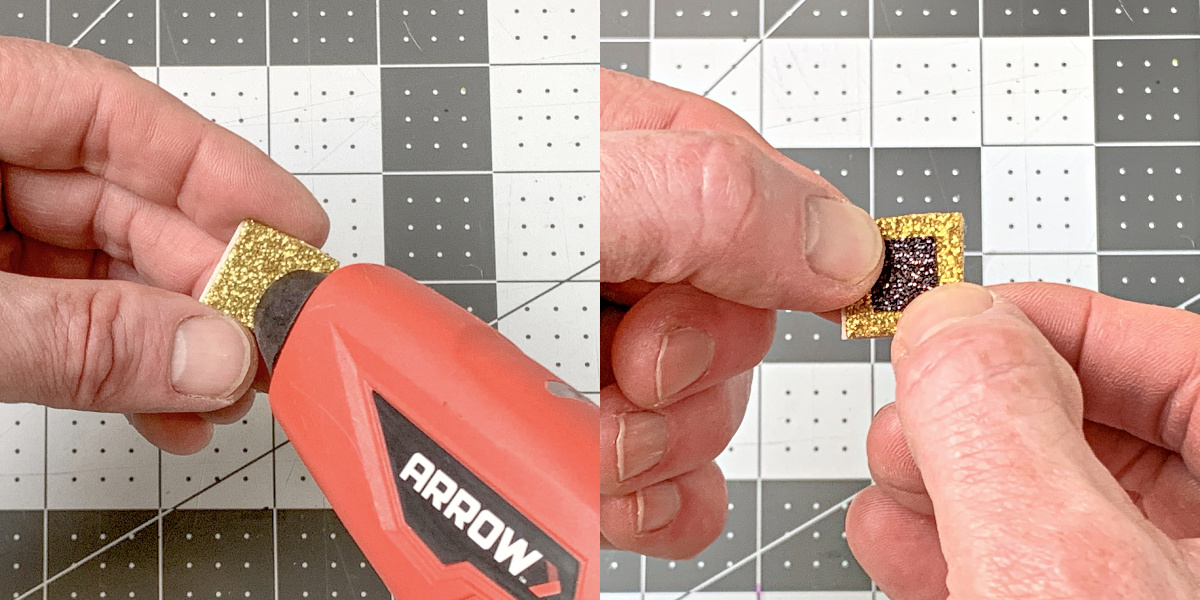
Press the gold square down onto the black ribbon using hot glue. Santa’s buckle is complete!
Add the Fur
You’re so close to finishing your Santa napkin rings! Cut a strip of fur ribbon or faux fur to fit both the top and bottom of your napkin ring.
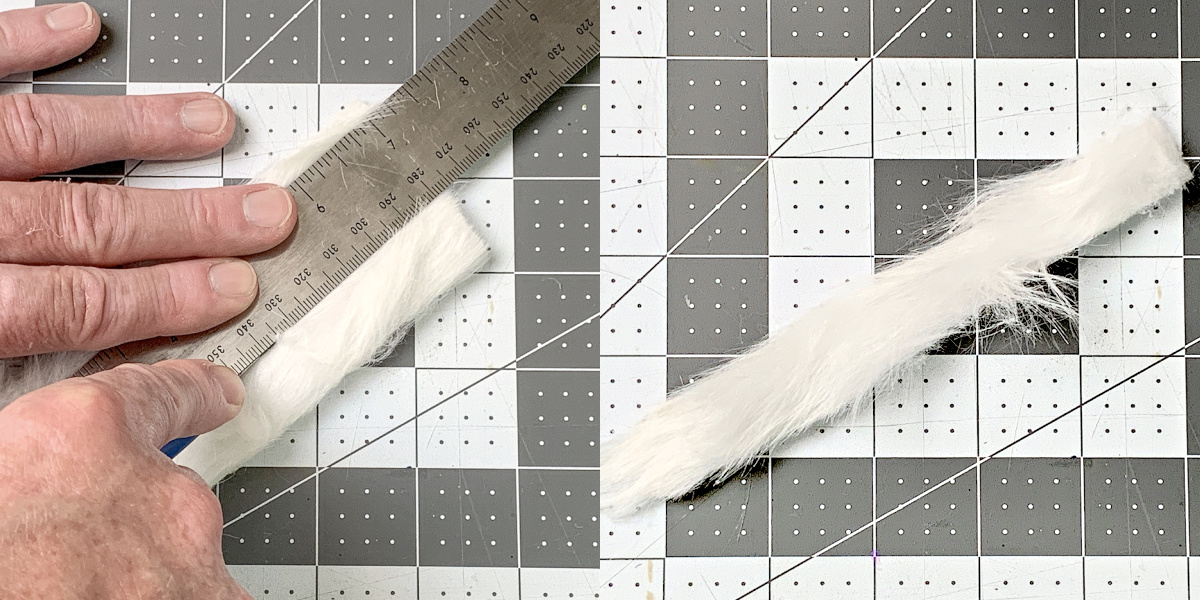
Use hot glue to adhere the fur to both the top and the bottom. Hold down until cool.
Guess what – you made one Santa napkin ring! Now you can make many, many more. What do you think of these Christmas napkin rings? Are you in?
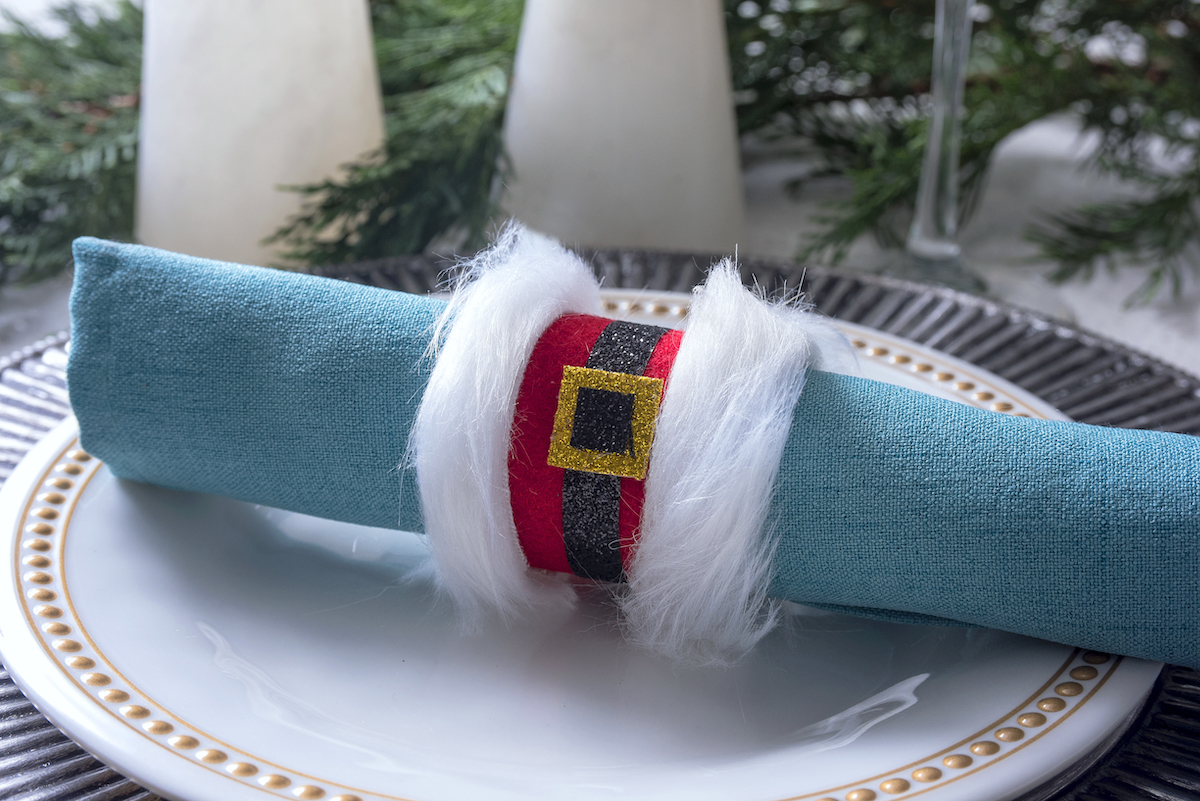
I just love the way that these Santa napkin rings look, and they compliment just about any decor.
If you loved this Christmas project, I’d love for you to check out these other holiday ideas:
- Clothespin Napkin Holder (Easy Home Decor DIY!)
- “From Santa” Free Printable Christmas Gift Tags
- Make Mini Santa Strawberries for Christmas
- Christmas Gift Card Holders Make the Holidays Fun
The post Santa Napkin Rings for Your Christmas Table appeared first on DIY Candy.