Make a gorgeous wooden beaded star of David craft for Hanukkah or any time of year! When you’re done, check out this fun star of David necklace craft too. This post contains affiliate links.
Hanukkah is one of my favorite holidays. While I love the cooking and hosting that comes with the major holidays, there’s something so fun about when it’s optional. There’s less pressure. There’s more room for doing things just because.
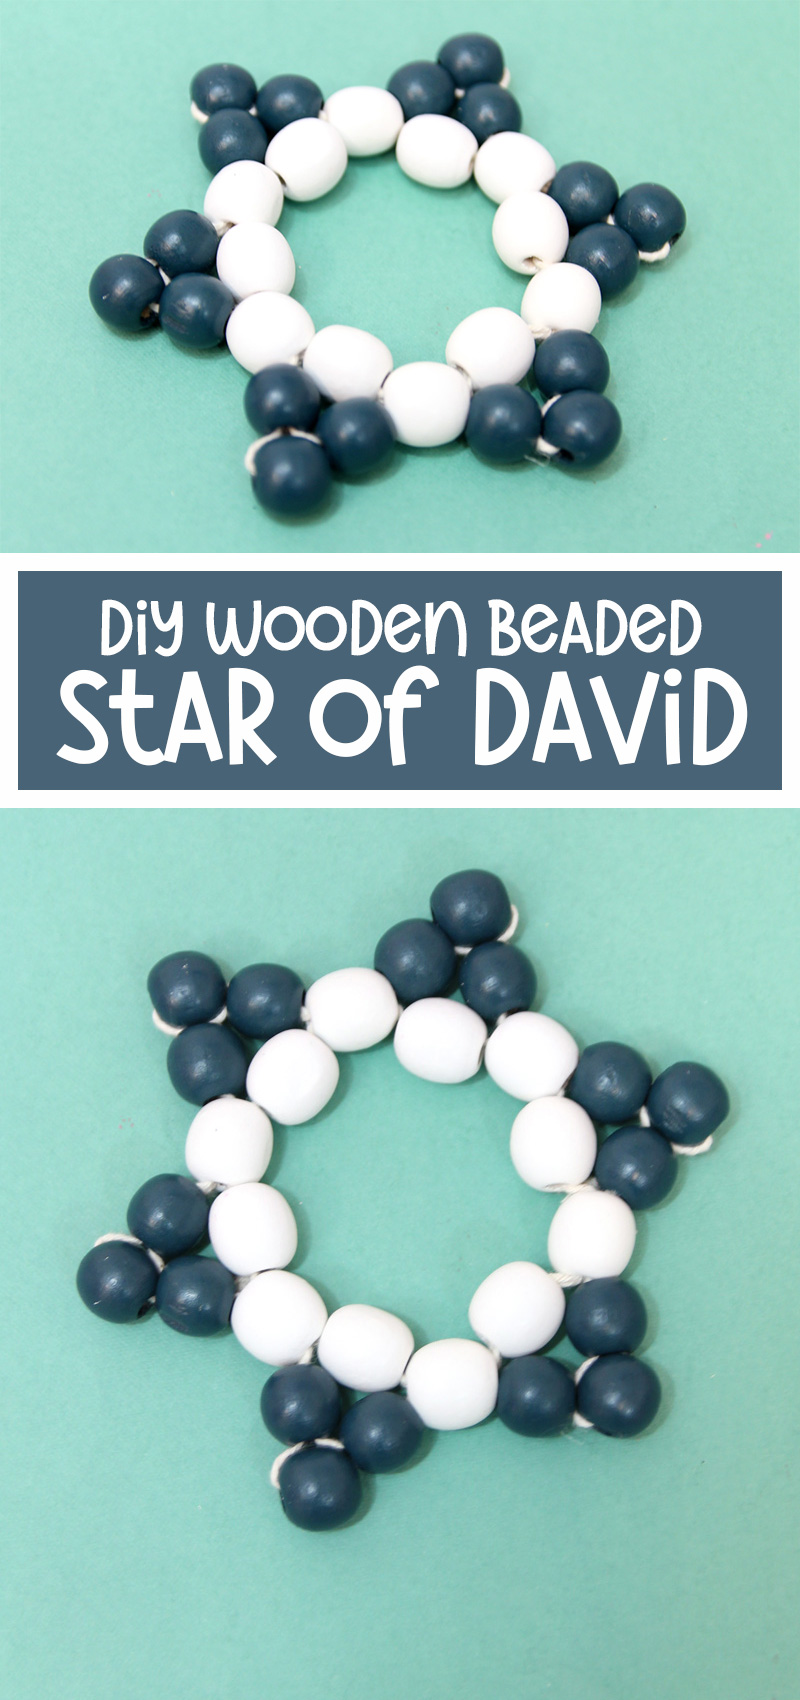
Today, I’m sharing a really pretty wooden beaded star of David craft.
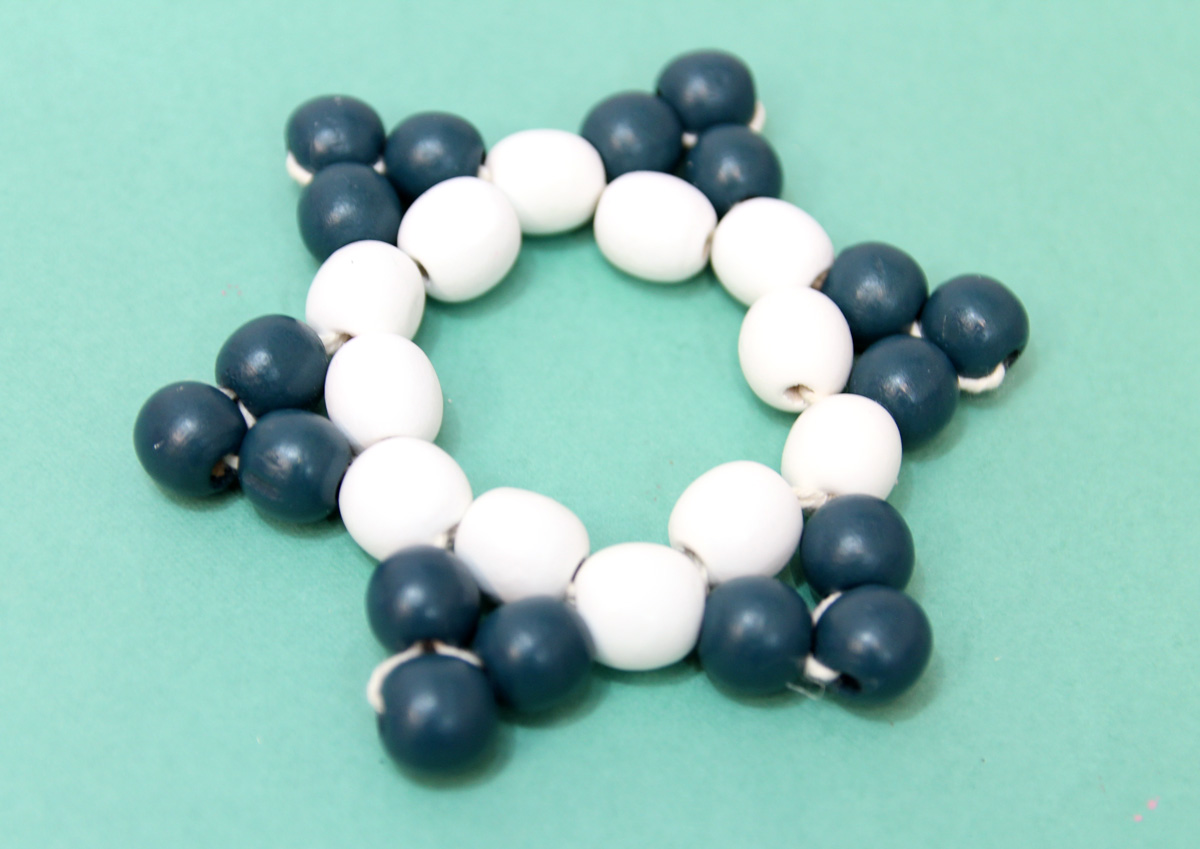
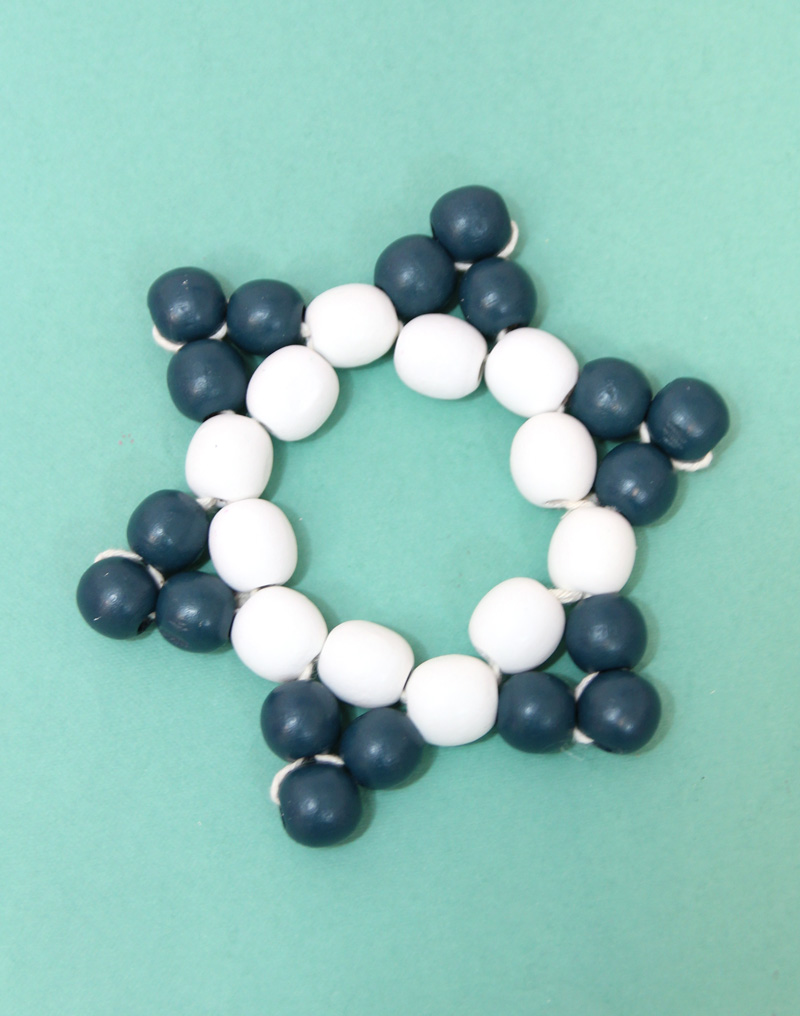
This pretty craft was intended to be a coaster for starters. However, because of the large, open center it’s not so ideal for that.
It does, however, work as a smaller trivet, since flat bottomed dishes would cover more of it.
You can also make a wooden beaded star of David as part of a Hanukkah gallery wall. The open-endedness of it means that you can make it in the size you’d like for the project you need.
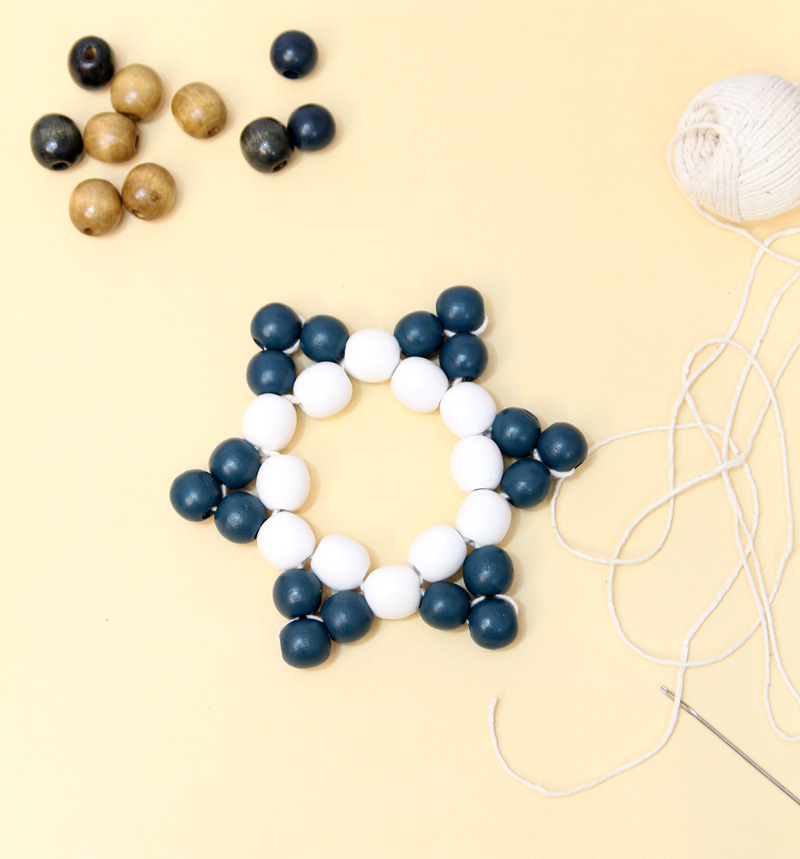
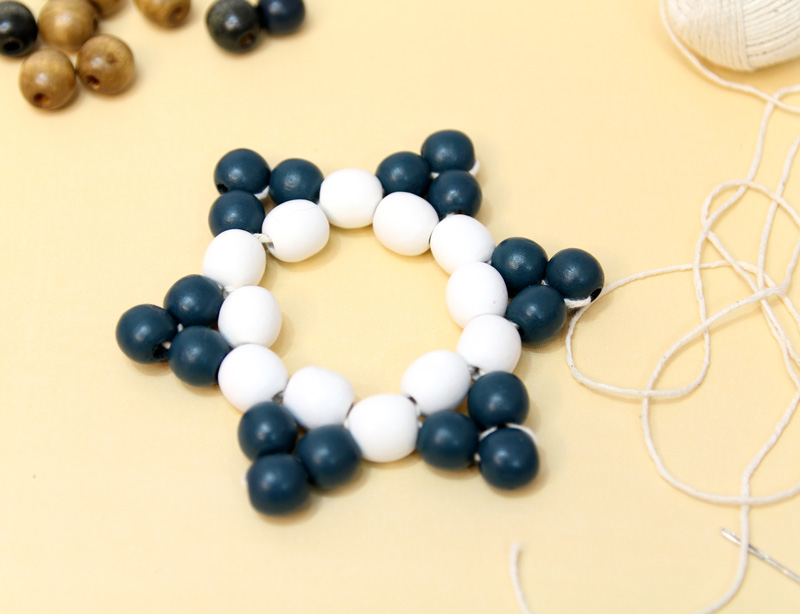
I used roughly 14mm beads for a coaster size. Go for 25 mm beads and you have more of a trivet. Work with 6mm beads and you can make a necklace. You can even turn it into a gorgeous boho-chic wall hanging as part of a gallery! Place it on your Menorah table as part of a Hanukkah display, prop it on a tiered tray or on an open book case.
My favorite part of the wooden star of David is that it is such a simple, classy piece of decor that’s seasonal but not overly so.
It’s also a fantastic workshop or party craft and a great idea for older kids to make in the classroom. It doesn’t take too much time or space, but is enough of a skill-building lesson to occupy people and give a satisfied feeling. The take-away is a gorgeous, giftable end-product. And since it doesn’t require any special equipment, and only minimal, affordable supplies, it’s really inexpensive when creating it in bulk.
Which type of string to use for the wooden beaded Star of David
To make this, I used cotton twine. My main reason for choosing that was to make it very visible for the tutorial while keeping it classy.
You can also use fishing line. You may prefer to use fishing line as it will basically be invisible, just make sure it’s really strong.
While you can use wire, you may find it kinking too much to work well with. And finally, you can try matching up your string to your beads so that it camouflages, however, if you’re making a high-contrast two tone like I am that won’t work.
Supplies needed
- 30 round wooden beads (I used 14-16mm beads). 12 are for the center, 3 each for each point. Ideally they should be the same size, but in a larger size, a tiny variation won’t really matter. They can be the same color or not. I used separate colors for the inner circle and for the points to make the tutorial easier to follow
- String – I used cotton twine (see notes above for more recommendations)
- A large, strong needle that will fit your string (I used one from an upholstery kit)
How to make a wood star of David for Hanukkah
1. Thread your needle. String on your 12 center beads.
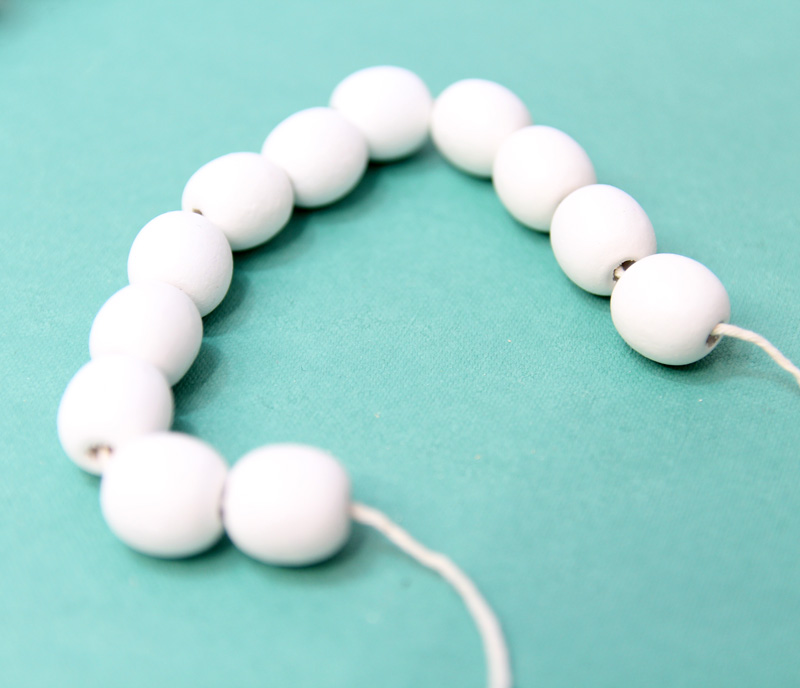
2. Thread your string back through the first bead. Pull it into a tight circle, with no extra space between beads.
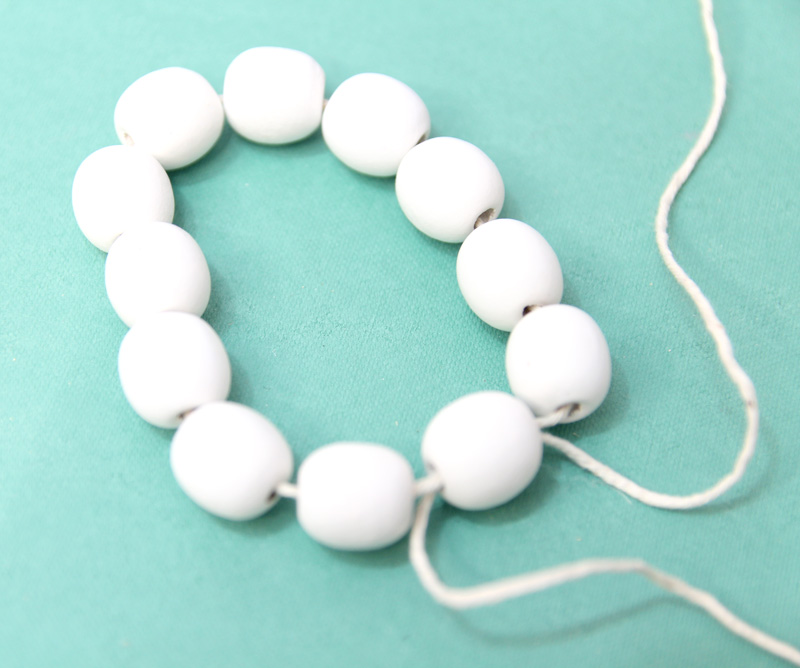
3. Add two of your star point beads. skip over one bead in the circle, and thread through the next.
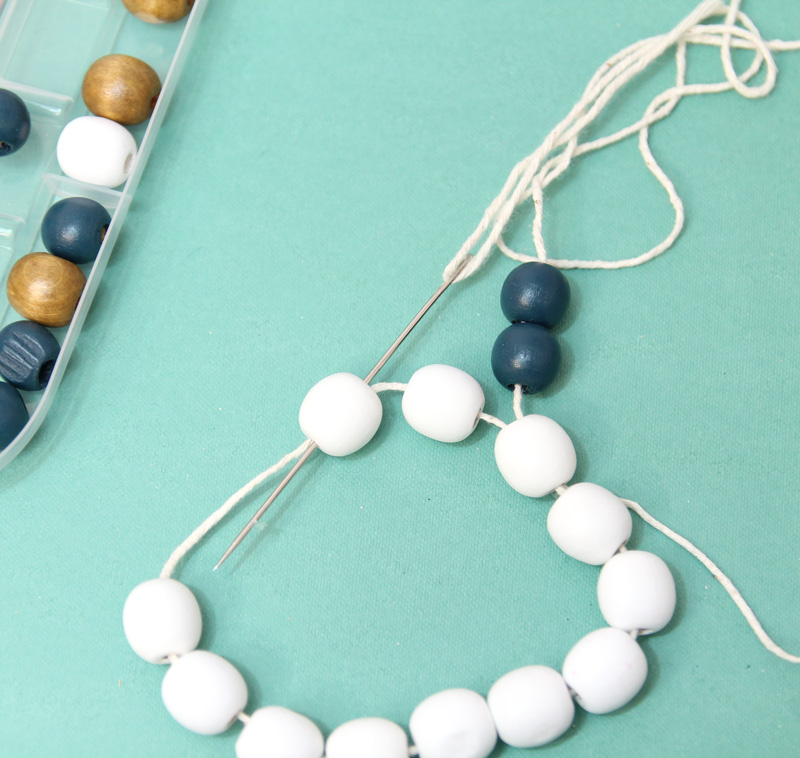
4. Your beads should sit flush over the next bead in the inner circle. Add your next two beads, skip over one, and thread your needle through the next.
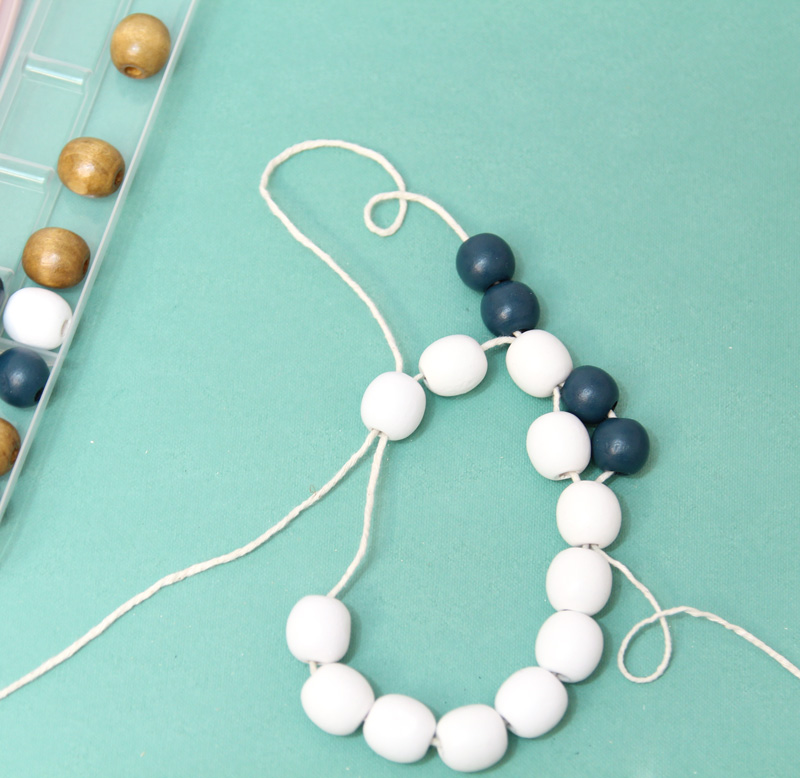
Pull the string tight so that these two again sit right over the inner bead that you skipped. At this point, if that first circle came loose as you were working, tighten it again. You’ll still be able to move around the beads if you force it, and you won’t want that extra string.
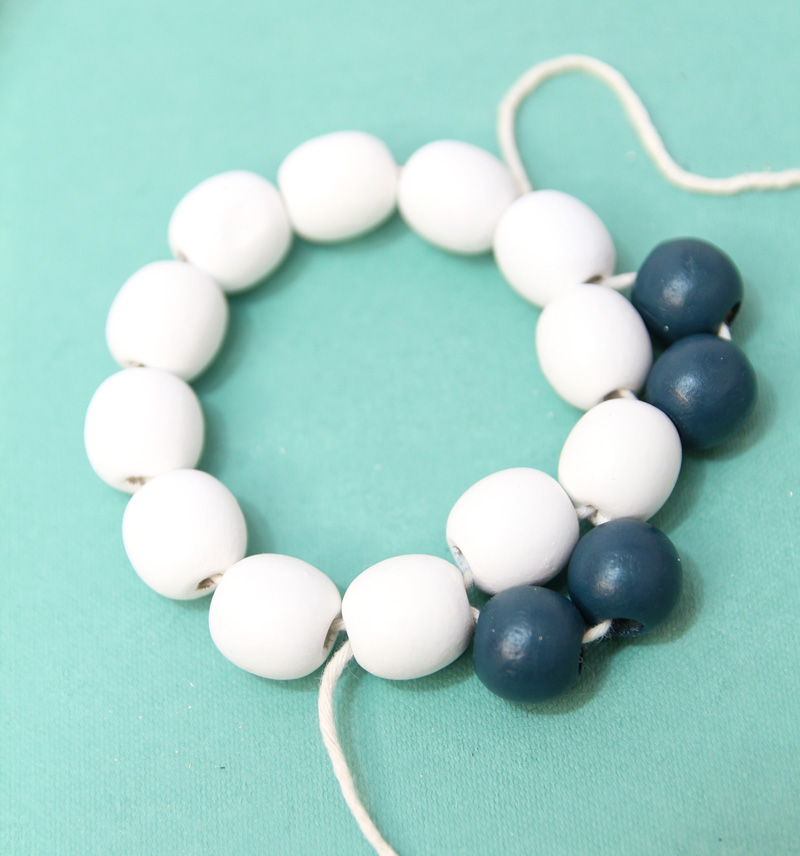
5. Keep working with this pattern, adding two beads and then threading the needle through every other bead from the inner circle. When you have six sets, you should reach your starting point. Thread the needle through the next base layer bead and then through the first bead only of the first set of two.
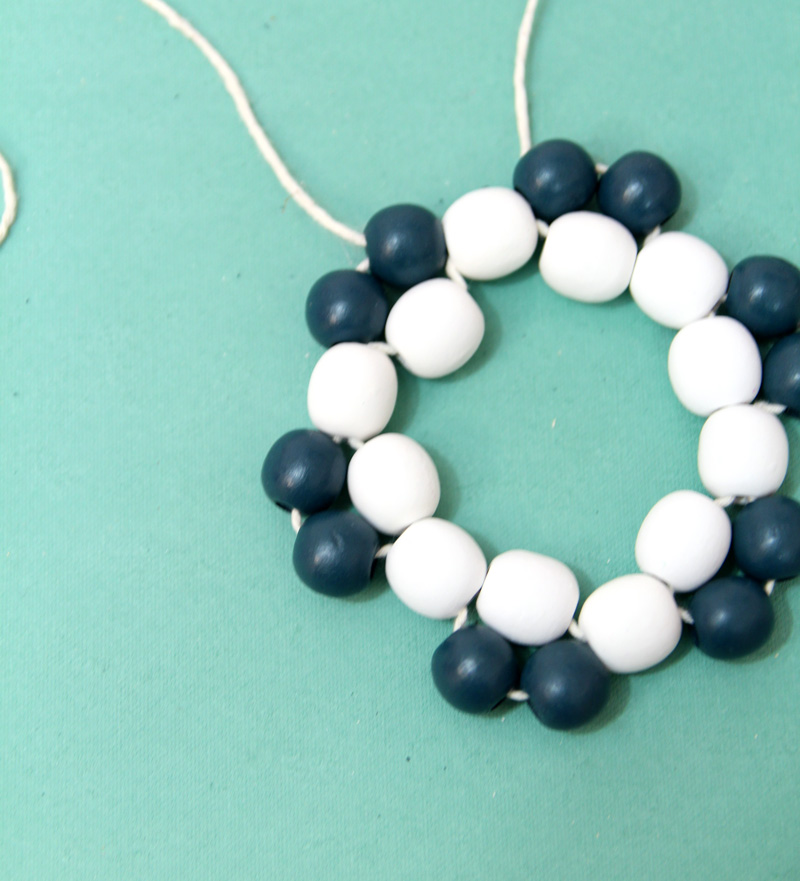
6. Add a single bead that nestles between the pair below it. Thread your needle through the second of the pair below.
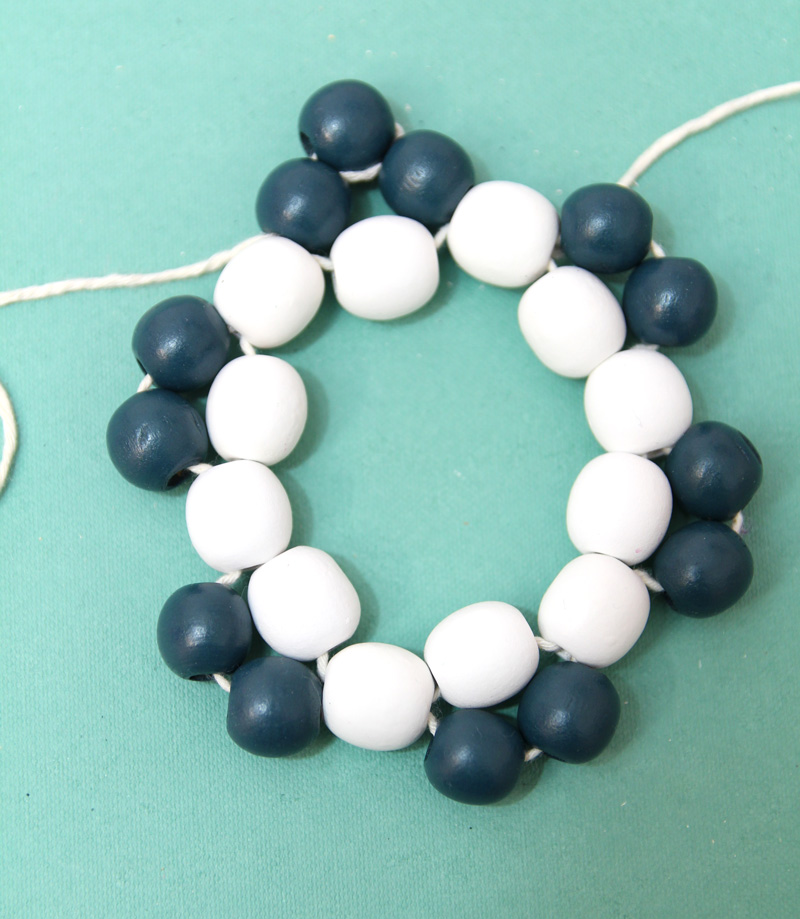
7. Bring your thread to the correct position to add your next point. Thread it through the center bead separating the two stars, and the first bead of the next point pair.
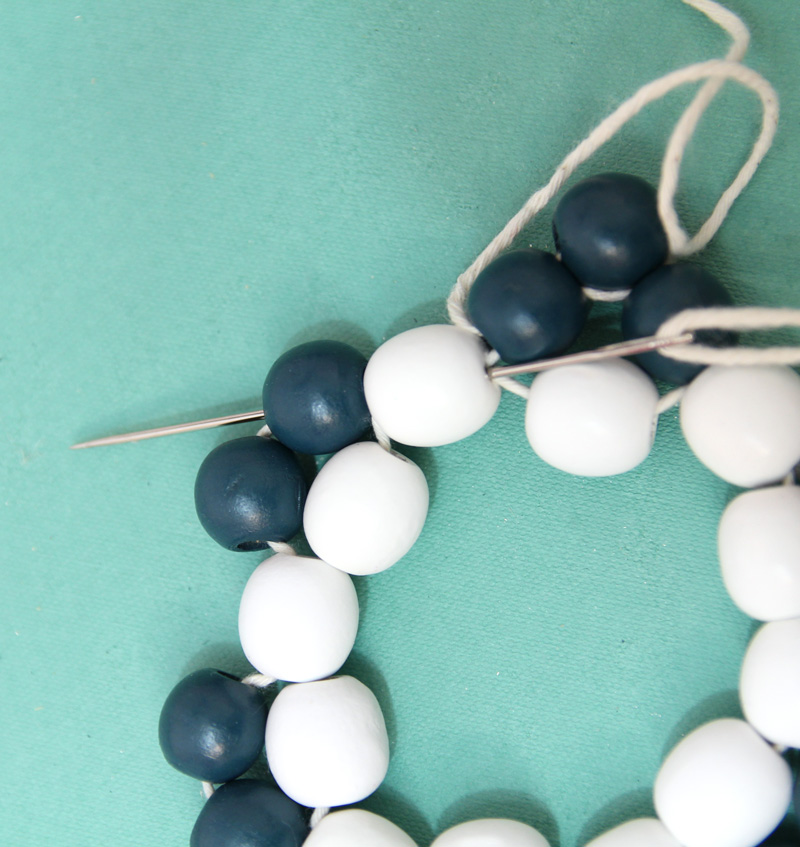
8. Thread on your point. Continue this process for all six points.
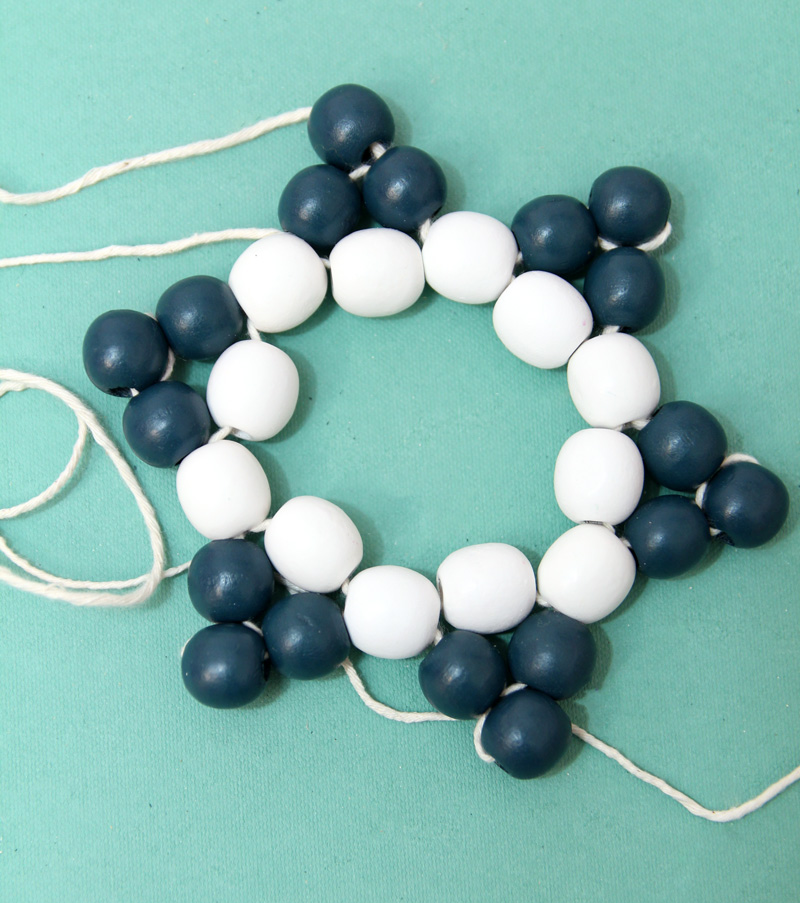
9. Thread your twine through beads to meet the other.
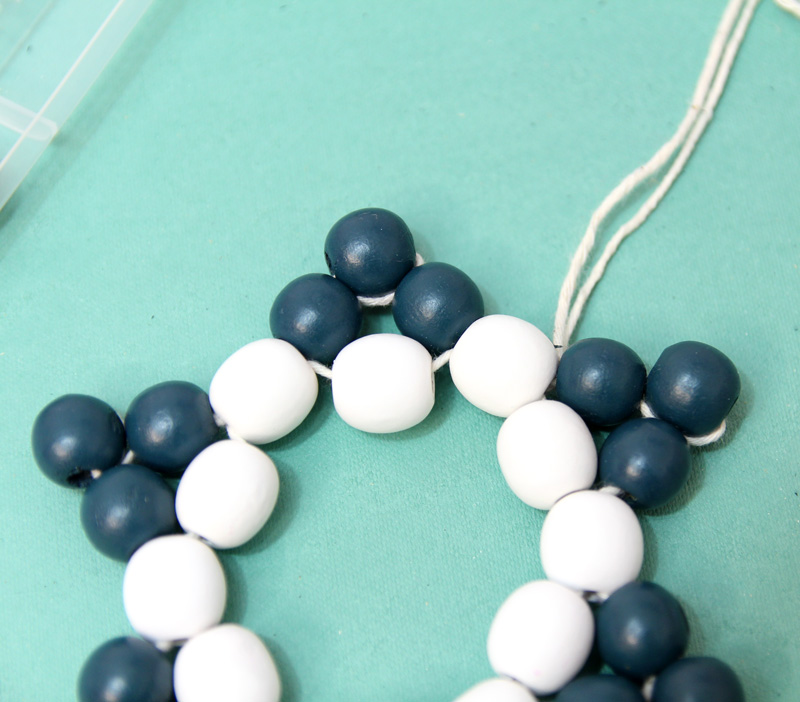
10. Tie together a few inches down-thread if you want a hook to hang it. Otherwise, thread your ends through a few beads in the back to make it more secure.
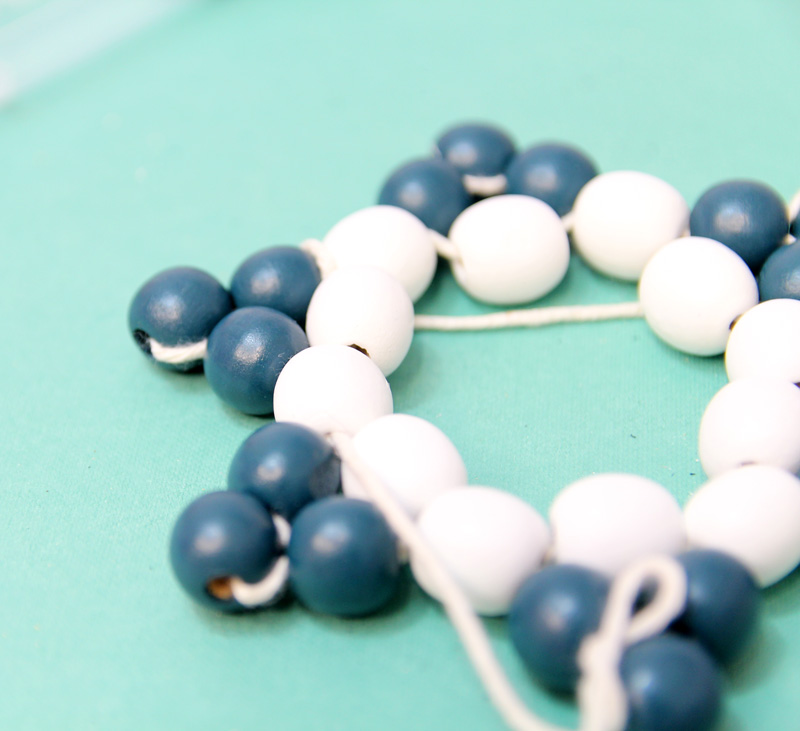
11. Knot in the back and trim. You can glue your knots for an extra level of security.
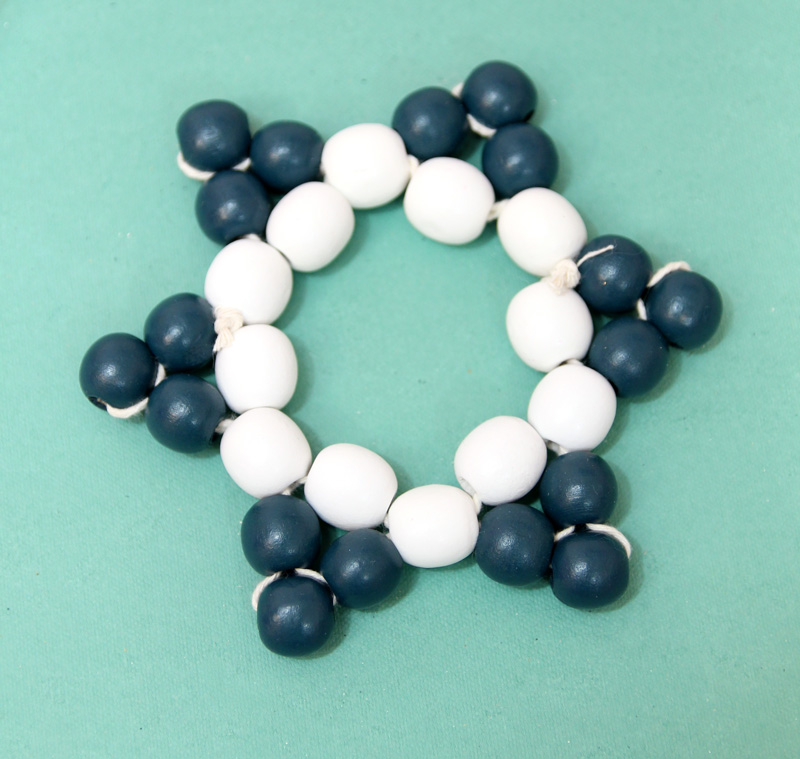
Your wooden beaded star of David is complete! What will you be making yours as? Comment below!

Star of David from Wood Beads
Craft a gorgeous star of david ffrom wood beads - perfect for Hanukkah or any time of year! Use it as a coaster or trivet, hang it form a wall, display it on a shelf...
Materials
Instructions
- Thread your needle. String on your 12 center beads.
- Thread your string back through the first bead. Pull it into a tight circle, with no extra space between beads.
- Add two of your star point beads. skip over one bead in the circle, and thread through the next.
- Your beads should sit flush over the next bead in the inner circle. Add your next two beads, skip over one, and thread your needle through the next. Pull the string tight so that these two again sit right over the inner bead that you skipped. At this point, if that first circle came loose as you were working, tighten it again. You'll still be able to move around the beads if you force it, and you won't want that extra string.
- Keep working with this pattern, adding two beads and then threading the needle through every other bead from the inner circle. When you have six sets, you should reach your starting point. Thread the needle through the next base layer bead and then through the first bead only of the first set of two.
- Add a single bead that nestles between the pair below it. Thread your needle through the second of the pair below.
- Bring your thread to the correct position to add your next point. Thread it through the center bead separating the two stars, and the first bead of the next point pair.
- Thread on your point. Continue this process for all six points.
- Thread your twine through beads to meet the other.
- Tie together a few inches down-thread if you want a hook to hang it. Otherwise, thread your ends through a few beads in the back to make it more secure.
- Knot in the back and trim. You can glue your knots for an extra level of security.
Notes
Adapt your size to your finished project size. When used as a coaster, you may want to stabilize it further since the inside is open.
Did you make this project?
Please leave a comment on the blog or share a photo on Pinterest
The post Wooden Beaded Star of David Craft appeared first on Jewish Moms & Crafters.
