Today it’s all about how to cook with Dutch Ovens. You can cook or bake so many things in a Dutch oven. You heard that right, if you have one or two of these with some charcoal and a fire starter or matches you are good to go. Cooking with firewood works well in a fire pit too! I love cooking over a campfire. I updated this post today because I wrote this post back in 2016!
You can truly be prepared to survive by boiling water and making meals with a Dutch oven. I highly recommend this style of Dutch oven because of the lid structure and size. Lodge Camp Dutch Oven, 6 Qt
I can’t lift more than a 6-quart Dutch oven because of the weight, especially when it’s full of food. I like this style because you can use the lid to stack other Dutch ovens on top of each other and the lid can be used as a griddle. The lid also is designed to hold the hot briquettes during the cooking process, making sure the food items are cooked through.
Very little fuel (charcoal or lump charcoal) is needed to use one of these cast iron gems. Please think of a Dutch oven as an oven using charcoal to bake your food.
Free Printable Cooking Chart
Whatever you bake in your conventional oven you can bake in one of these. My PRINTABLE chart will help you get the temperature required to bake your recipes outside of your kitchen. No special cookbook is needed. Please keep in mind those beautiful ceramic enamel-coated Dutch ovens can only be used in a conventional oven or on a stovetop. They are enamel cast iron Dutch oven varieties that come in different colors.
Here is my PRINTABLE Dutch oven chart that Lodge Manufacturing allowed me to make for you: Dutch Oven Chart
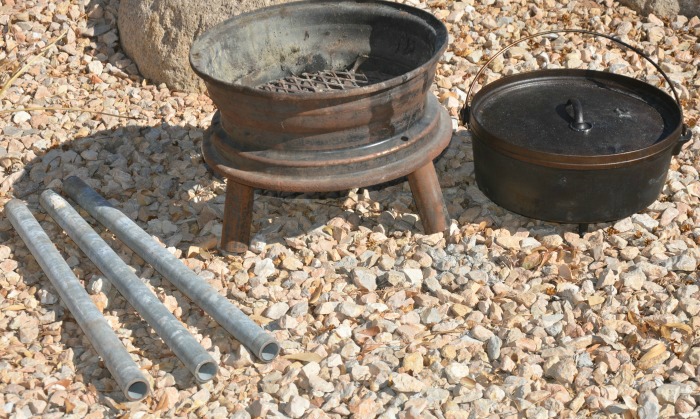
Oh my goodness, can’t you just smell the charcoal briquettes, oh, and the bacon, gotta love it! I decided to just set up my Dutch oven stand and cook one of my favorite meals using a Dutch oven to generate the pictures for this post.
This Lodge Dutch oven above comes “pre-seasoned” so it’s ready to use after washing it with some mild soap and hot water, then patting it dry. Keep it oiled, clean, and dry and these babies last a lifetime. You don’t want to put these in your dishwasher, it MAY damage the surface texture and you’d have to season it again. They are oven-safe if you want to cook inside during inclement weather.
Please Share Ideas
Keep in mind, you can make so many food items in a Dutch oven. If you have some ideas on how to use a Dutch oven I will add yours to my list! Thank you in advance!
If you start practicing NOW with your Dutch oven you will be so comfortable using one after a disaster hits your community. Or if you go camping, all you do is use the recipes you already have in your cookbooks or you have memorized.
My Lodge Dutch oven cooking chart below shows you how many charcoal pieces/hot coals: you need to get the right temperature for the Lodge Dutch oven size you are using. Easy peasy, I promise.
Meal Preparation With Dutch Ovens:
- boil water or other liquid like soups, even creamy soup varieties
- loaf of bread
- beans
- chili
- make a casserole with meat, rice, or other ingredients
- lasagna and other pasta recipes
- peach cobbler along with other desserts – the crusts are to die for!
- chicken pot pie
- pizza
- baked chicken
- sauces with fresh herbs – adding to the flavors you like
- biscuits
- various kinds of stews like beef stew
- you can fry a number of things to make a favorite dish – you can also sear and do some braising
- cooks roasts to a perfect tenderness
Charcoal Starter Canister
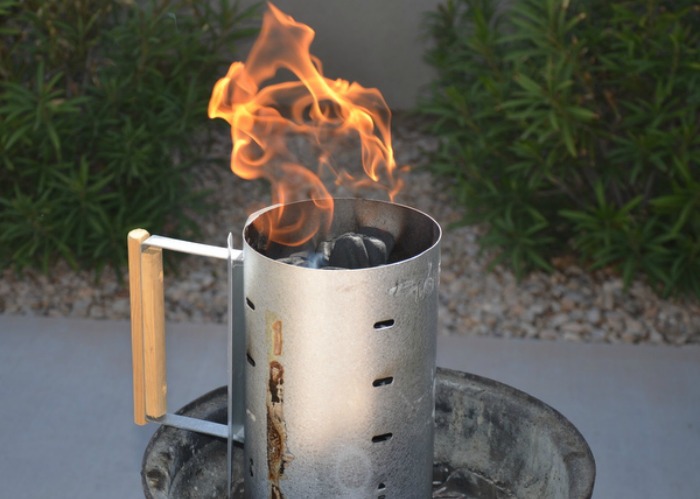
I thought I would show you how I get my “charcoal” going with a little newspaper and this fire-starter canister. It costs about $26.00 Weber Rapidfire Chimney Starter and I have had it for years. To start out right you place it in a safe location so you don’t set fire to your surroundings.
Next, you take some loosely made newspaper balls or small twigs and place them in the bottom of the canister. Next, I place charcoal on top of the newspaper in the canister.
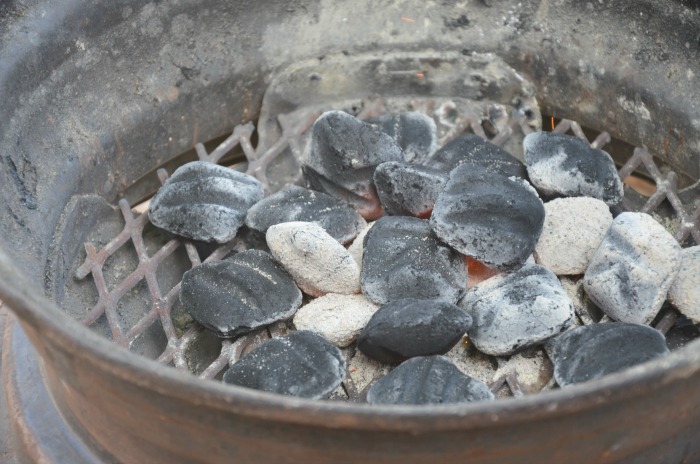
Then I use a match or butane fire starter to light the newspaper on fire. I wait until the charcoal looks half black and half whitish….this means it’s almost ready to use on the top and bottom of the Dutch oven.
I have a 12-inch Lodge Dutch oven with a lid that has a lip. It’s my favorite for cooking with charcoal on the top and bottom. It’s great for stacking Dutch ovens as well.
Dutch Oven Stand
I recently showed the Dutch oven stand my brother-in-law, Duane S. made for me. Dutch Oven Stand post. Note that the Dutch oven has two types of handles. There is one that swivels on the oven itself so you can lift it, and there is one on the lid too. This is pretty typical of the classic-style Dutch oven. I use a “lift lifter” to open the oven both to check on the meal as it’s being cooked and to gain access when serving the meal.
I Counted Out Too Many Charcoal Pieces
Well, I got distracted, which I often do, and put more than 24 charcoal pieces in the fire-starter canister. So of course, we used all of the charcoal anyway. Here is my PRINTABLE Dutch oven chart that Lodge Manufacturing allowed me to make for you: Dutch Oven Chart
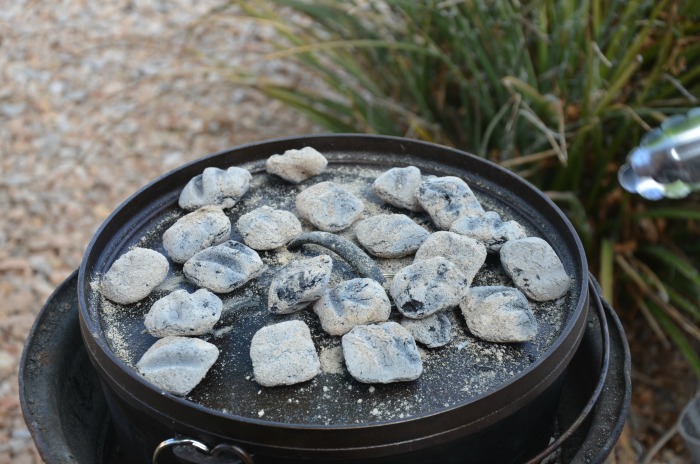
The picture above shows the charcoal that’s ready to use underneath the Dutch oven and also on top of the lid to start this amazing meal.
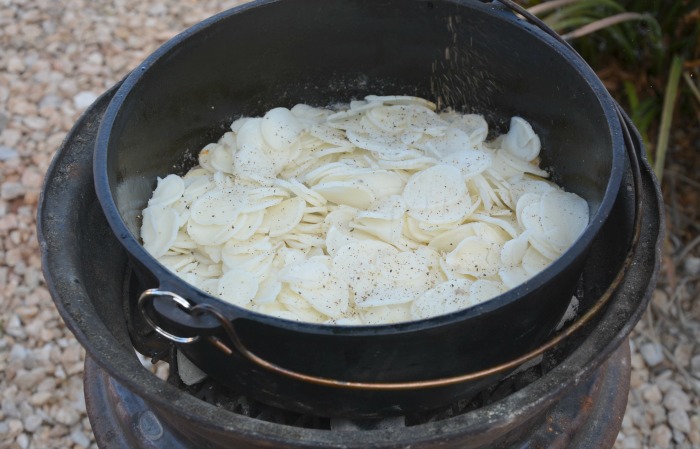
I melted a half cube of butter in the bottom of the oven before placing these potatoes in the hot Dutch Oven. These are dehydrated potatoes that I soaked in tepid water for 45 minutes and then drained off the water making for the perfect amount of moisture as they cooked.
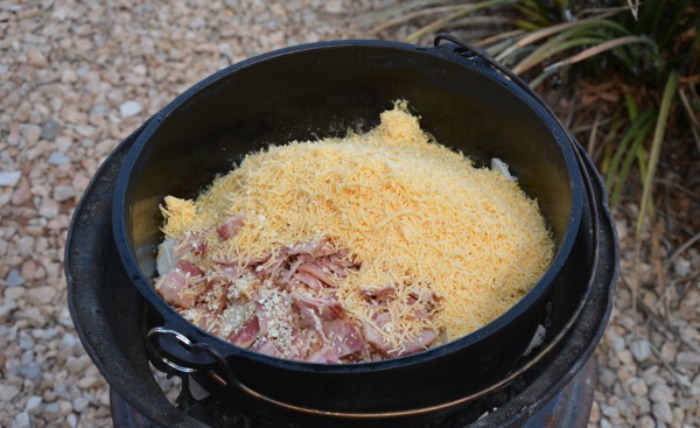
Here I placed some pre-cooked bacon cut into pieces, some freeze-dried onions (not reconstituted), and lots of freshly grated cheese.
Check out the picture below to see how I put the hot charcoal pieces on top of the lid.
See the lid lip, I like these for this kind of meal. You can buy some LODGE Dutch ovens without the lip, but you can’t stack other ovens on top if the lid doesn’t have the lip shown.
Remember, I lost count of the charcoal so I just threw the remaining charcoal on top. It still works, you just have to check the food to make sure they’re cooking the way you desire.
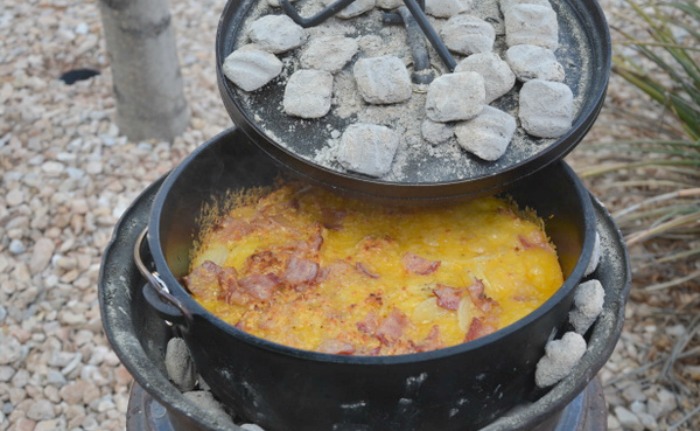
Here is the finished meal…fabulous…I think it took about 20-25 minutes.
Be Prepared to Cook Outside – Then Properly Clean the Dutch Oven
Dutch ovens can provide many years of reliable service if properly cared for. This includes proper cleaning once the cooking is done. The best approach is to remove any food that may be stuck to the sides and bottom of the oven. It may require putting some water in the oven while still on the heating source and heating the water until it is near the boiling point.
Using a sponge or plastic scrubber you scrape the food from the sides. Try not to use anything that may scratch the surface. Always stay clear of using any kind of harsh soap product since it can damage the special coating on the oven surface. Rinse the oven with clean warm water. Towel dry the oven and allow it to then air dry.
Once the oven is dry reheat it until it is hot to the touch and then remove it from the heat and apply a thin layer of vegetable oil to fill the pores. Once cool enough, wipe the oil off with a towel. It is also suggested to leave the lid slightly ajar so the pan is properly ventilated during storage.
Be Sure And Store It Dry
You’ll find with continued use that over time the Dutch oven will need additional care which may include the stripping and re-curing/seasoning process. It could be that your Dutch oven actually gets rusty or takes on a rancid odor. You will want to treat the oven as if you just purchased it and cure it for future use. Many people find it most convenient to heat the oven over an outdoor propane stove.
Make sure that ALL the surfaces are given the opportunity to get hot. Turn up the heat on the propane stove and then carefully reheat all the surfaces such that they are “smoked” for approximately five minutes. Remove the oven from the heat and then rub all the surfaces with some steel wool until clean using hot running water at the same time. Wipe the clean oven and dry it with paper towels and then allow the oven to air dry. Once totally dry, you then will re-season the unit as you cured it prior to placing it in service the first time.
Take good care of this unique cooking tool and enjoy those delicious meals for many years to come. You can also purchase disposable liners for your ovens, or line them with aluminum foil to make them easier to clean.
I often check out the Lodge website and just dream…… Lodge Manufacturing Company.
My Favorite Reasons Why I Store Aluminum Foil
My favorite things:
Lodge Cast-Iron Reversible Grill/Griddle 20 by 10 inch diameter
Lodge Pre-Seasoned Cast-Iron Square Grill Pan, 10.5-inch diameter
Lodge Camp Dutch Oven Lid Stand
Final Word
I hope you enjoyed today’s post on how to cook with a Dutch oven. Many of you probably grew up using them, but I believe there are many families that may not know how to use them. It’s so easy to use and taking it camping is the best thing ever! Please tell me how you use yours. May God Bless this world, Linda
The post How To Cook With Dutch Ovens appeared first on Food Storage Moms.

