Want to know how to make pasta at home? If this is your first time trying to make pasta in your home, let these steps guide you to making the best homemade pasta you’ve ever tasted!
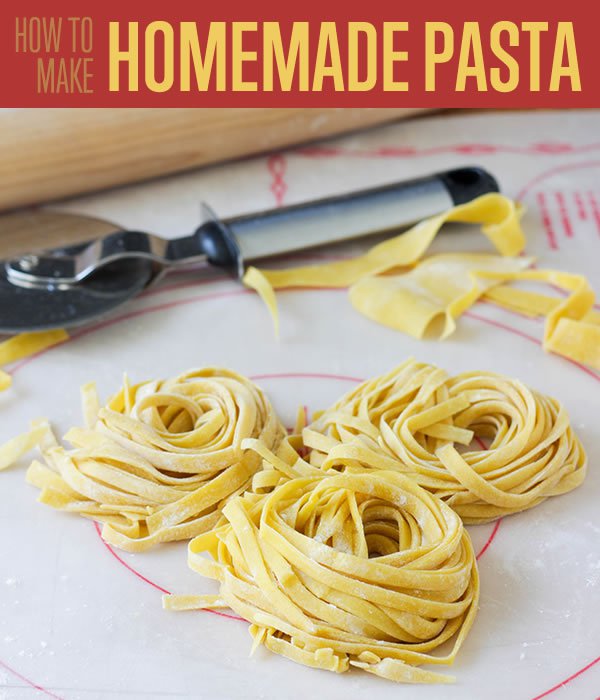
How to Make Pasta for Beginners
Sure, fresh homemade pasta is a treat when you eat out at your favorite Italian restaurant… or when you decide to spend a little more on something special at Whole Foods. But learning how to make pasta from scratch? Isn’t that… kind of labor-intensive?
Well, you won’t find me rushing to correct you. Just about anything is going to be more work than ripping open a cardboard box filled with dried pasta. But there are no tricky techniques nor abundant knowledge of pasta needed to make it at home. Just a few simple ingredients, some elbow grease, and patience… and you’ll soon be enjoying the best pasta you’ve ever tasted!
Today, I’ll be demonstrating how to make pasta completely by hand and without the help of a pasta roller. I hope you won’t be intimidated by the number of steps–really, you shouldn’t be, because the amount of active work (apart from the rest required for the pasta) is under an hour to an hour, tops. If you’ve been looking for a good weekend project that uses materials you already have at home, then this one is for you.
Here’s the list of ingredients you’ll need:

- 2 cups (~10 oz.) all-purpose flour
- 2 large whole eggs
- 4 large egg yolks
- 1 tsp. kosher salt (½ tsp. table salt)
And here are the tools we’ll be using today:
- fork
- rolling pin (I use a French one in the pictures)
- pizza cutter
- bowl scraper or bench knife
- strainer
I am using a silicone pastry mat as well, to prevent the pasta from sticking to my working surface–but this is optional, as you can easily use your own counter if you lightly flour it before working with the pasta dough.
How to Make Pasta for Beginners
Step 1.
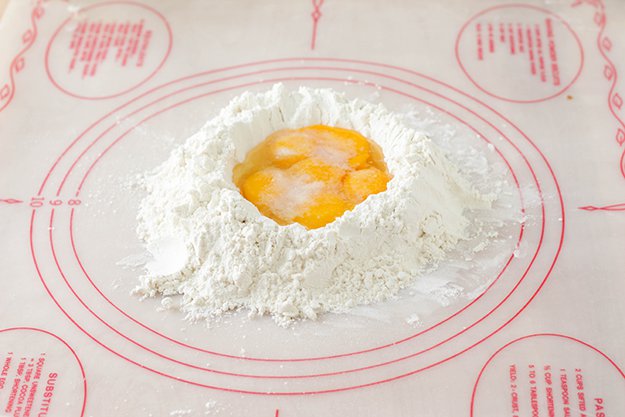
Take 1½ c. flour and pour it in a pile onto your work surface. Create a crater in the center of the pile that is 3-4 inches in diameter. Pour the eggs and egg yolks into the center of the flour, then sprinkle the salt on top of the eggs.
Step 2.
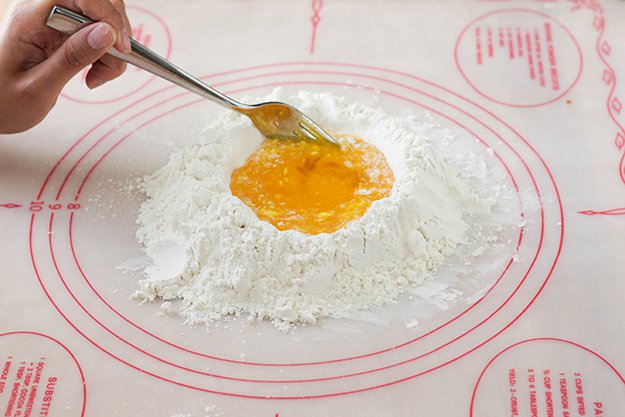
With your fork, start gently whisking the eggs and salt in the crater. It’s not a big deal if some flour gets into the egg mixture, but try your best to keep the eggs in the center of the flour. Patch up any trails in the flour that might allow your eggs to leak out.
Step 3.
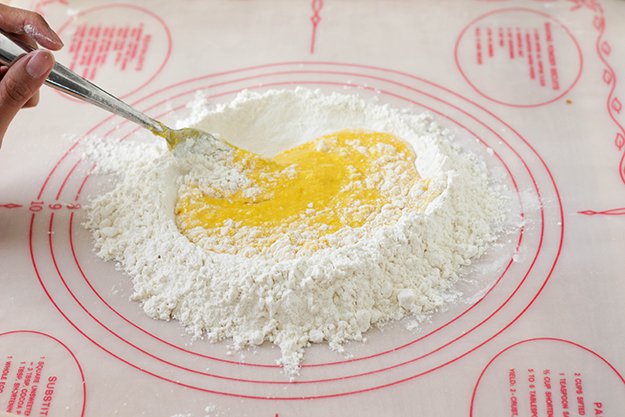
Once the eggs are thoroughly scrambled, start incorporating small amounts of flour from the sides of the crater with your fork.
Step 4.
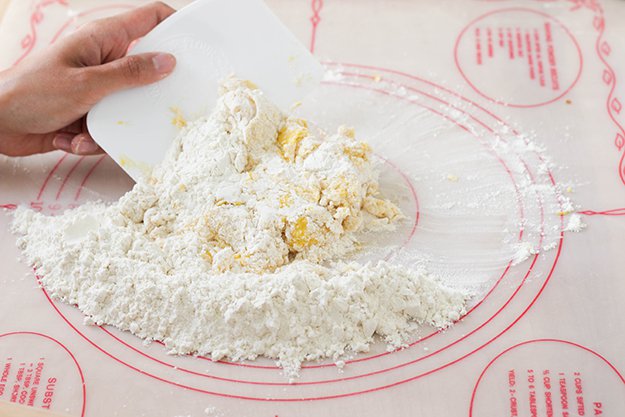
The dough will start to become too difficult to work with your fork as you continue to incorporate more flour. This is when you’ll start to use your bench knife/bowl scraper–use it to scrape the excess dough off your fork, then keep scooping small amounts of flour with your scraper into the dough.
Step 5.
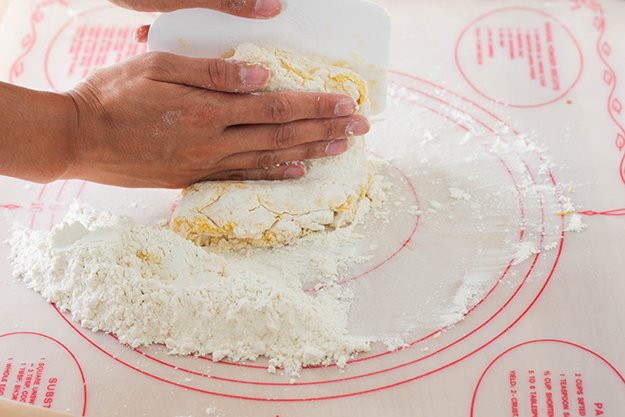
Press gently with your hand to mix the flour into the dough. It will be pretty sticky–but you can keep using the scraper to get the stickier parts off your palm. Fold the dough in half and turn it 45 degrees, then incorporate a little more flour with your scraper and press gently with your hand again. Continue to do this motion until most of the flour has been used.
Try these delicious #PASTA #recipes tonight!! http://t.co/8IlfEHyQX2 #food pic.twitter.com/AD60mGHJID
— Homemade Recipes (@BestHomeRecipes) July 23, 2015
Step 6.
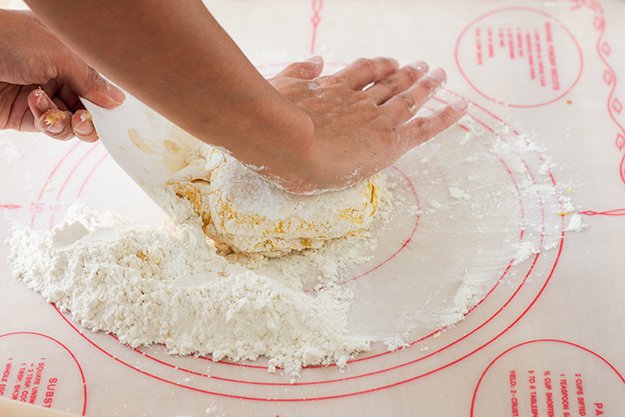
Once most of the flour has been incorporated, start kneading the dough with the bottom of your palm. Press down firmly with your palm all over the dough, then fold it in half and rotate it 45 degrees. Continue this process for 5-10 minutes.
Step 7.
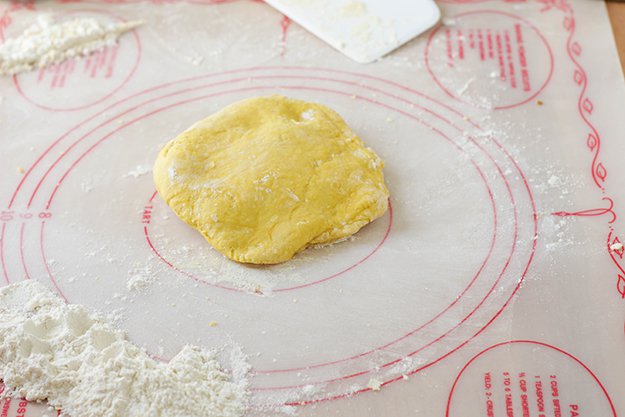
You’ll know that you’re finished kneading when the dough feels slightly moist to the touch but doesn’t stick. When you press down on the dough, it should be elastic and spring back. If it’s still too wet, incorporate more flour from the extra ½ c. flour you have set aside–but only about a tablespoon at a time. If it’s too dry (like mine is–whoops!), very lightly sprinkle it with water and knead. And I do mean lightly–maybe ½ tsp. or 1 tsp. at most.
Step 8.
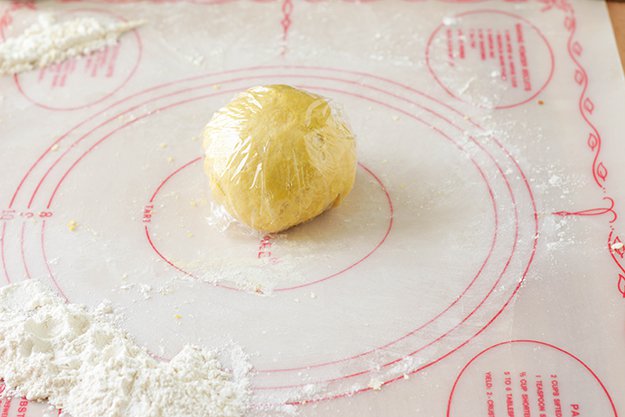
Tuck the edges of the dough underneath to form a ball, then squeeze the edges together. Wrap with plastic wrap and let rest for an hour–or more, if you need to walk away to take care of something else. As long as you give it at least an hour, it’ll be fine. (This would be a good time for you to make whatever sauce you were planning on serving your pasta with! I have a great [basil pesto] recipe that you can use, if you’d like.)
Step 9.
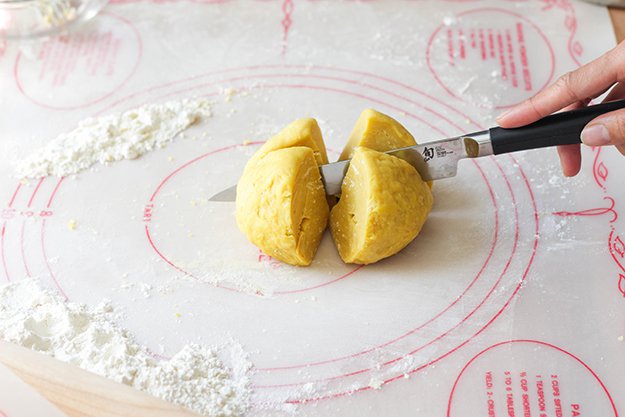
Welcome back! Let’s unwrap the dough and quarter it. Take one quarter of the dough to work with at a time and re-wrap the other pieces in the plastic to prevent it from drying out.
Step 10.
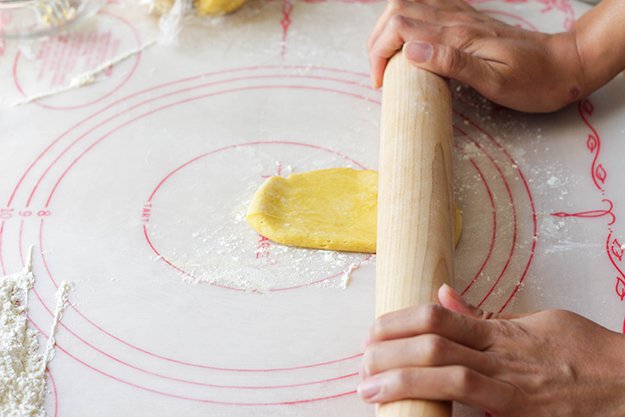
Use your rolling pin to flatten the piece of pasta dough.
Step 11.
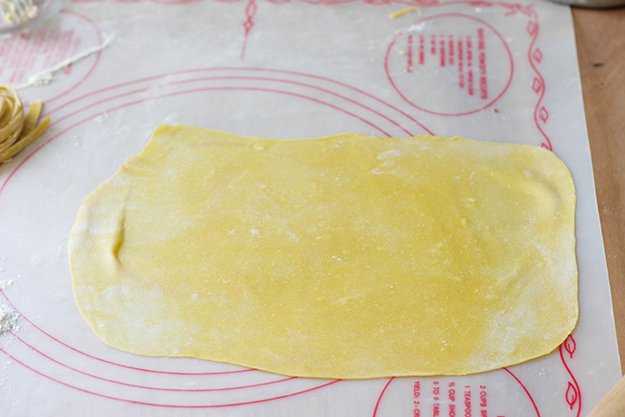
Rotate the dough 45 degrees after each consecutive roll to ensure even rolling. Try to encourage the dough to form a rectangular shape as best you can. If the pasta starts sticking to the surface, feel free to use that reserved flour I mentioned earlier to dust the counter between rolling.
Step 12.
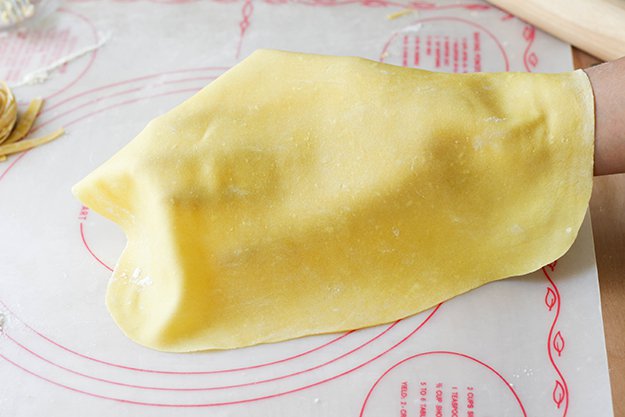
The dough will stretch to a size similar to an 8×11 sheet of paper. You can either use a sheet of paper as a frame of reference or put your hands underneath the pasta sheet to see how transparent the dough is. If you can see the outline of your hands, you’ve got the right thickness!
Step 13.
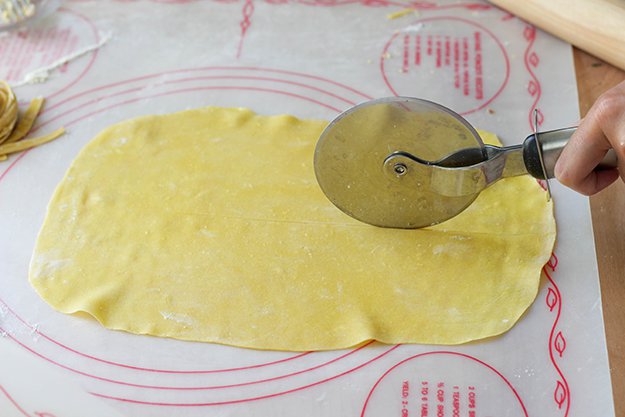
Make sure you dust the counter with a little more flour before you go any further. Once you place your pasta sheet on top of your floured surface, cut it in half length-wise with your pizza roller.
Step 14.
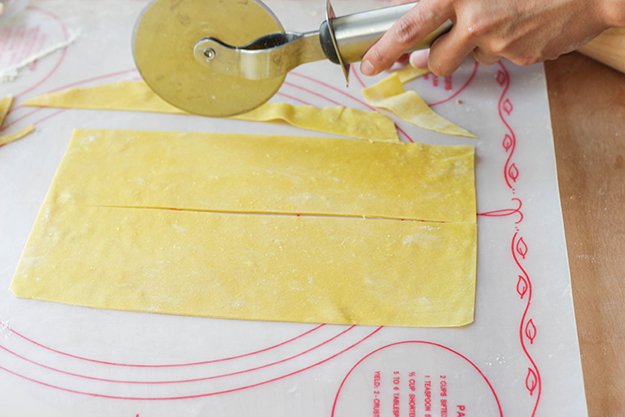
You can trim your curved edges to create a perfect rectangle with your roller. If you don’t mind imperfect pasta, you can opt to keep the round edges in if you’d like–but I find it easier to cut the pasta with sharp edges. (If you want to make lasagna, you’d be done at this point! But I’ll keep going for the rest of you noodle-lovers.)
Step 15.
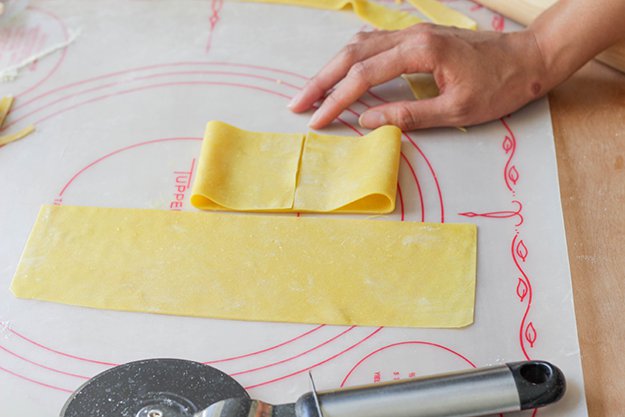
Fold the edges toward the center on each sheet, lengthwise.
Step 16.
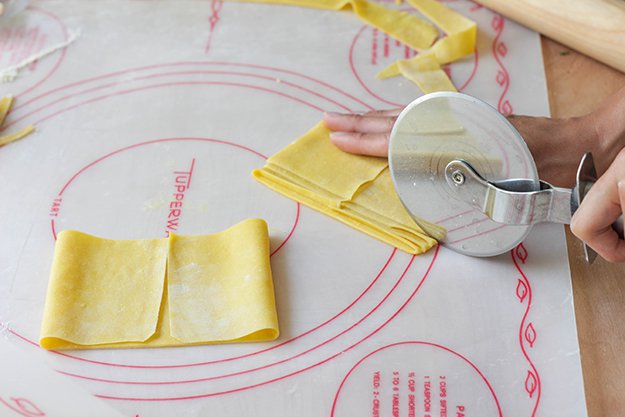
Using your pizza cutter, start slicing your noodles from the top to the bottom. You can use a ruler if you like, to be precise, but I think it’s more rustic to cut them without any kind of measurement. (I also think it’s too fussy!) I estimate that I cut my noodles at a centimeter width–similar to fettucine.
Step 17.
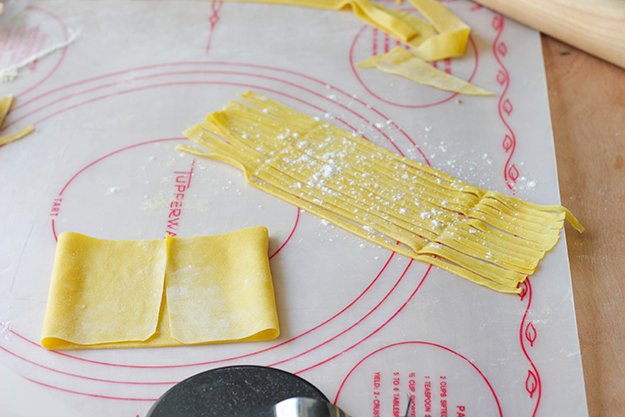
Unroll your pasta gently. (I used my scraper to pick up the edges–this might help you and save some time.) Lightly dust with flour.
Step 18.
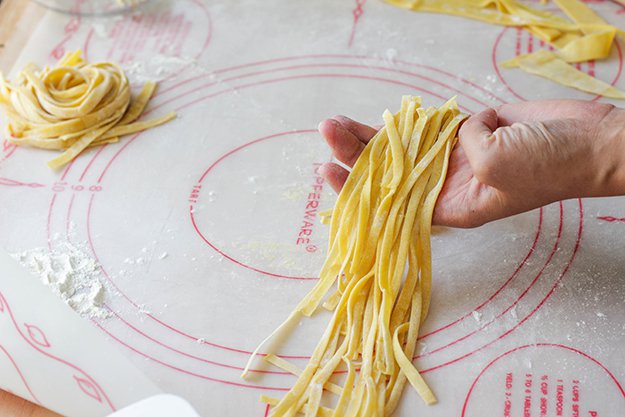
Handle your pasta gently to ensure the flour lightly coats the noodles to prevent them from sticking.
Step 19.
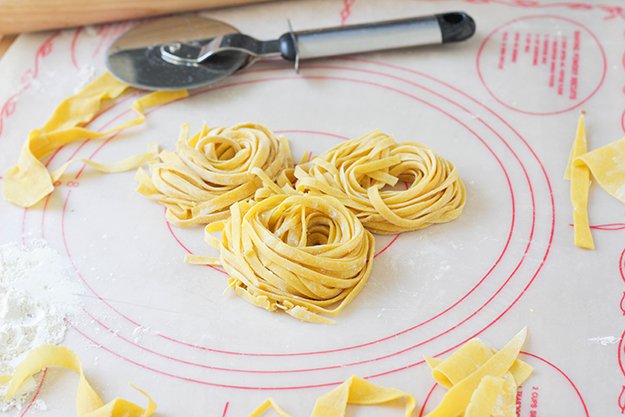
Roll the noodles into a nest to prevent tangling. Repeat these steps until you’ve worked your way through all four quarters of your dough. (I got impatient and took a picture after I was three-quarters of the way done.)
Step 20.
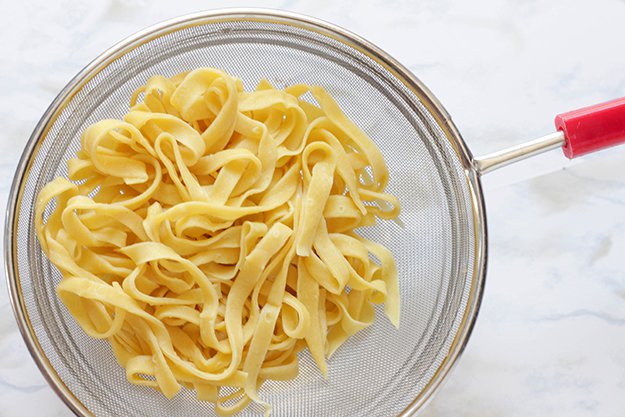
Before you start rolling your last quarter of dough, start boiling salted water in a large pot–6 cups of water and 1 Tbsp. of kosher salt over high heat. When you’ve finished making your noodles and the water is boiling, toss the noodles into the water and stir. WATCH THE POT. Fresh noodles cook much, much more quickly than dried ones. In my experience, it takes 2 minutes or less for the noodles to reach al dente, or chewy/bite consistency. As soon as the noodles are done, turn off the heat and dump the water and noodles into a strainer–no need to rinse them with cold water.
Step 21.
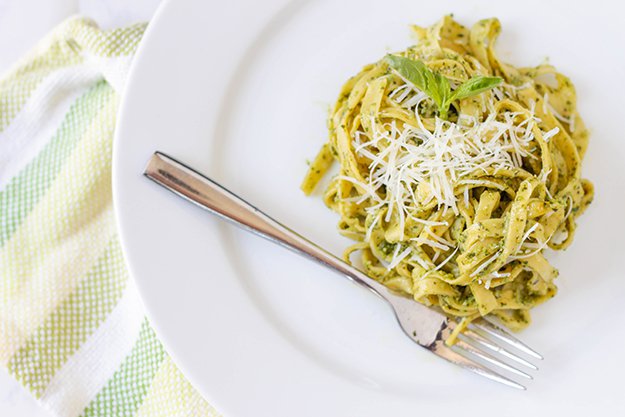
Immediately toss with your preferred sauce (in my case, it’s basil pesto) and serve!
If you want to make noodles in advance for later use, let them dry for a few minutes after slicing and unfolding them–2-3 minutes should be enough. Dust with flour and roll into a nest to prevent tangling, then wrap or bag them with a resealable plastic bag and put them in the freezer. I find that this is much less fussy than drying them on racks or coat hangers or what-have-you… and you can have fresh pasta at your convenience for up to 3 months! Just take them out of the freezer and toss them directly into the boiling water–the freezer will add maybe a minute at most to the cook time.
You don’t have to go out to a fancy restaurant to experience the delicious al dente of freshly-made pasta anymore–you can make it yourself, and with little extra cost. Really, it’s not even about saving money in the end; it’s about the satisfaction that you’ll feel with each amazing homemade bite. I have to warn you, though: making fresh pasta is dangerous. Once you’ve realized how good it tastes, it’ll be a lot harder to go back to those dry pasta sticks!
Need a pasta recipe to try out your homemade pasta? Then check out this recipe from Food Wishes:
Are you going to give this a try? Let us know below in the comments!
Stay connected with us on Facebook, Twitter, Pinterest and Instagram!
